
TL;DR:
Lemma: When flattening / dressing a sharpening stone, what’s the best approach to avoid contamination?
Methodology:
- Made some contamination free 10 µm resin diamond sharpening stones with a low to medium grit concentration (20% by weight).
- Flattened 1 sample each on a glass plate with a water slurry and a typical abrasive: 3 different grain sizes of SiC, on diamond powder of identical size
- Flattened 1 sample on an electroplated stone under running water
- Flattened 1 sample on a piece of SiC sandpaper (F1500).
- Looked under the SEM for contamination – using a backscatter detector which shows elemental contrast and EDS, which identifies elements and thus nails contamination down.
Results:
- Flattening a resin stone on SiC will embedded the SiC particles in the surface, no matter how small the particles are (larger / smaller than the grit of the stone).
- Flattening a resin stone on EP stones works very well, but you will inevitably catch a couple of those larger diamonds. It also consumes the EP stone very quickly.
- Flattening a resin stone on diamond powder will embed the diamond in the surface layer, but also create quite a bit of glass-particles that will get stuck in the surface layer. Those particles are sub micrometer sized and I would consider them a health hazard if airborn.
- Flattening a resin stone on SiC paper tears out the diamonds, surprisingly enough. There is very little contamination.
- A better flattening / dressing approach is needed to keep stones pure. I employ one on the DrMarv stones that does not contaminate. Watch out for a future blog post on how to do this.
Actual Science and long version:
This is part of a series of blog posts, where I try to apply my professional knowledge on how chip formation and material removal happen to knife sharpening. I think this could also be called: debunking myths. Because this probably will ruffle some feathers, and is likely to be denied by some people, let me state firmly here: everything you will see in this post is real, and repeatable.
Sharpening stones experience uneven wear. This is because they are inherently anisotropic in their composition, but also because we as humans use them inequally. Often, the end parts of the stone do not get used, as you do not want to fall “off the edge”. Moreover, different movements, pressures and just general wear sometimes require you to flatten, dress or renew a stone. For simplicity’s sake, I will from this point onwards call the process “dressing”, as it is the technical term. What you apply this to (renewing the surface, flattening the stone or actual dressing, e.g. creating a surface morphology suited to the application) is irrelevant, as the general mechanic is a 3 body abrasion on a flat surface.
I’ve done a ton of reviews on sharpening stones so far, and the largest majority of these had particles embedded that shouldn’t actually be in them. Some of these contamination stem from non-sufficient abrasive hygiene in the factories (you’d be surprised how easily micron sized powder becomes airborn and lingers for hours!), but some also from dressing these. At higher concentrations, SiC is used as a filler material, decreasing cost and increasing the bond hardness.
Three different approaches have been analysed for this:
I.) Abrasive slurry on a glass plate
A often suggested dressing method is a piece of glass (which is surprisingly flat!) or granite, and to mix an abrasive slurry on top of this glass surface. Often, SiC is used, as it’s a hard abrasive, easily and cheaply available. If you want to take a look at what the SiC I used looks like, head to this abrasive snippet.
For the actual dressing, I took a flat piece of silica-glass. It was cleaned by rubbing it vigorously with a soap-water mixture and then rinsing under running water. A small amount (about 3 grams) of SiC powder was applied to the surface and water added until a slurry that is soft but does not run away much was created. The sample specimen was then moved in a figure 8 movement across the surface until the top surface flattened out nicely. The sample specimen was then rinsed under running water while being rubbed intensively. Afterwards, it was dried and put into a sample holder where it is unable to touch other samples. Before SEM analysis, the sample was cleaned with a de-ionized water steam cleaner (110°C, 3 bar) and rinsed with 99 % pure ethanol. It was dried with a blast of compressed and filtered air.


Optical micrograph of the dressed surface. Abrasive used: SiC FEPA 300, 400 and 1000. Note the very even and homogenous surface and continuously smoother surface. Instrument: Leica Emspira.
3 different grain sizes of SiC were employed to dress 3 identical samples. FEPA grades 300, 400 and 1000, corresponding to micrometre sizes of (roughly) 34, 17 and 4.5 µm. This means there is a much larger, a larger and much smaller grain size used. The microscope images clearly show that it’s very hard to pick out the SiC particles from the actual abrasive, as they are very small and every particle is reflective. Playing with the polarisator on our microscope didn’t really change anything on this.
Luckily enough, it is very easy to distinguish SiC particles in the SEM, as Silicon is a much heavier element than the carbon predominant in resin and diamond. Thus, the backscatter detector (BSD) shows these as very bright particles. Final identification can be undertaken via EDS analysis. If you are unfamiliar with these techniques, I’ve written a blog post explaining these.
Let’s start with the FEPA 300 grit SiC powder:
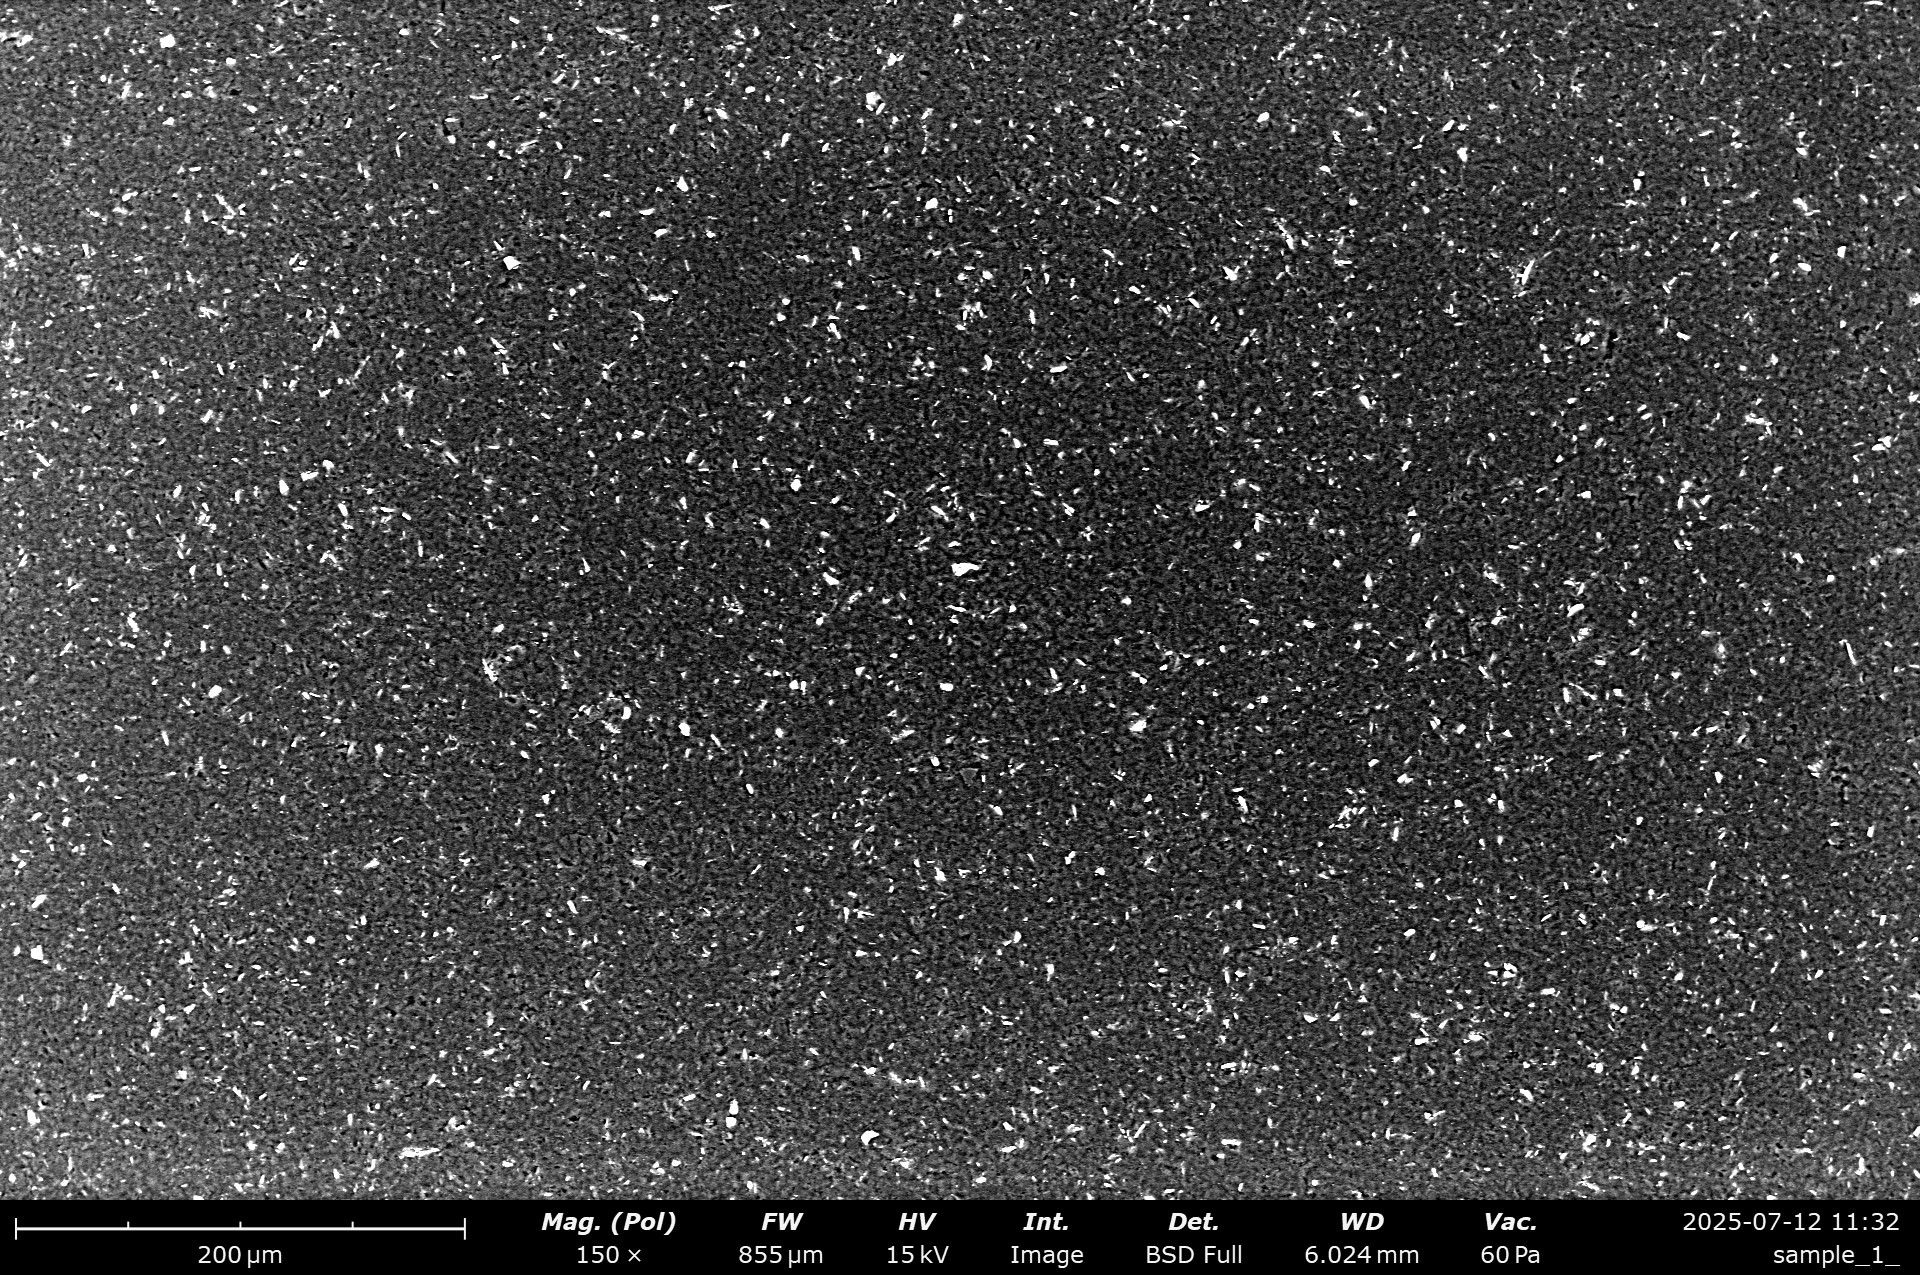
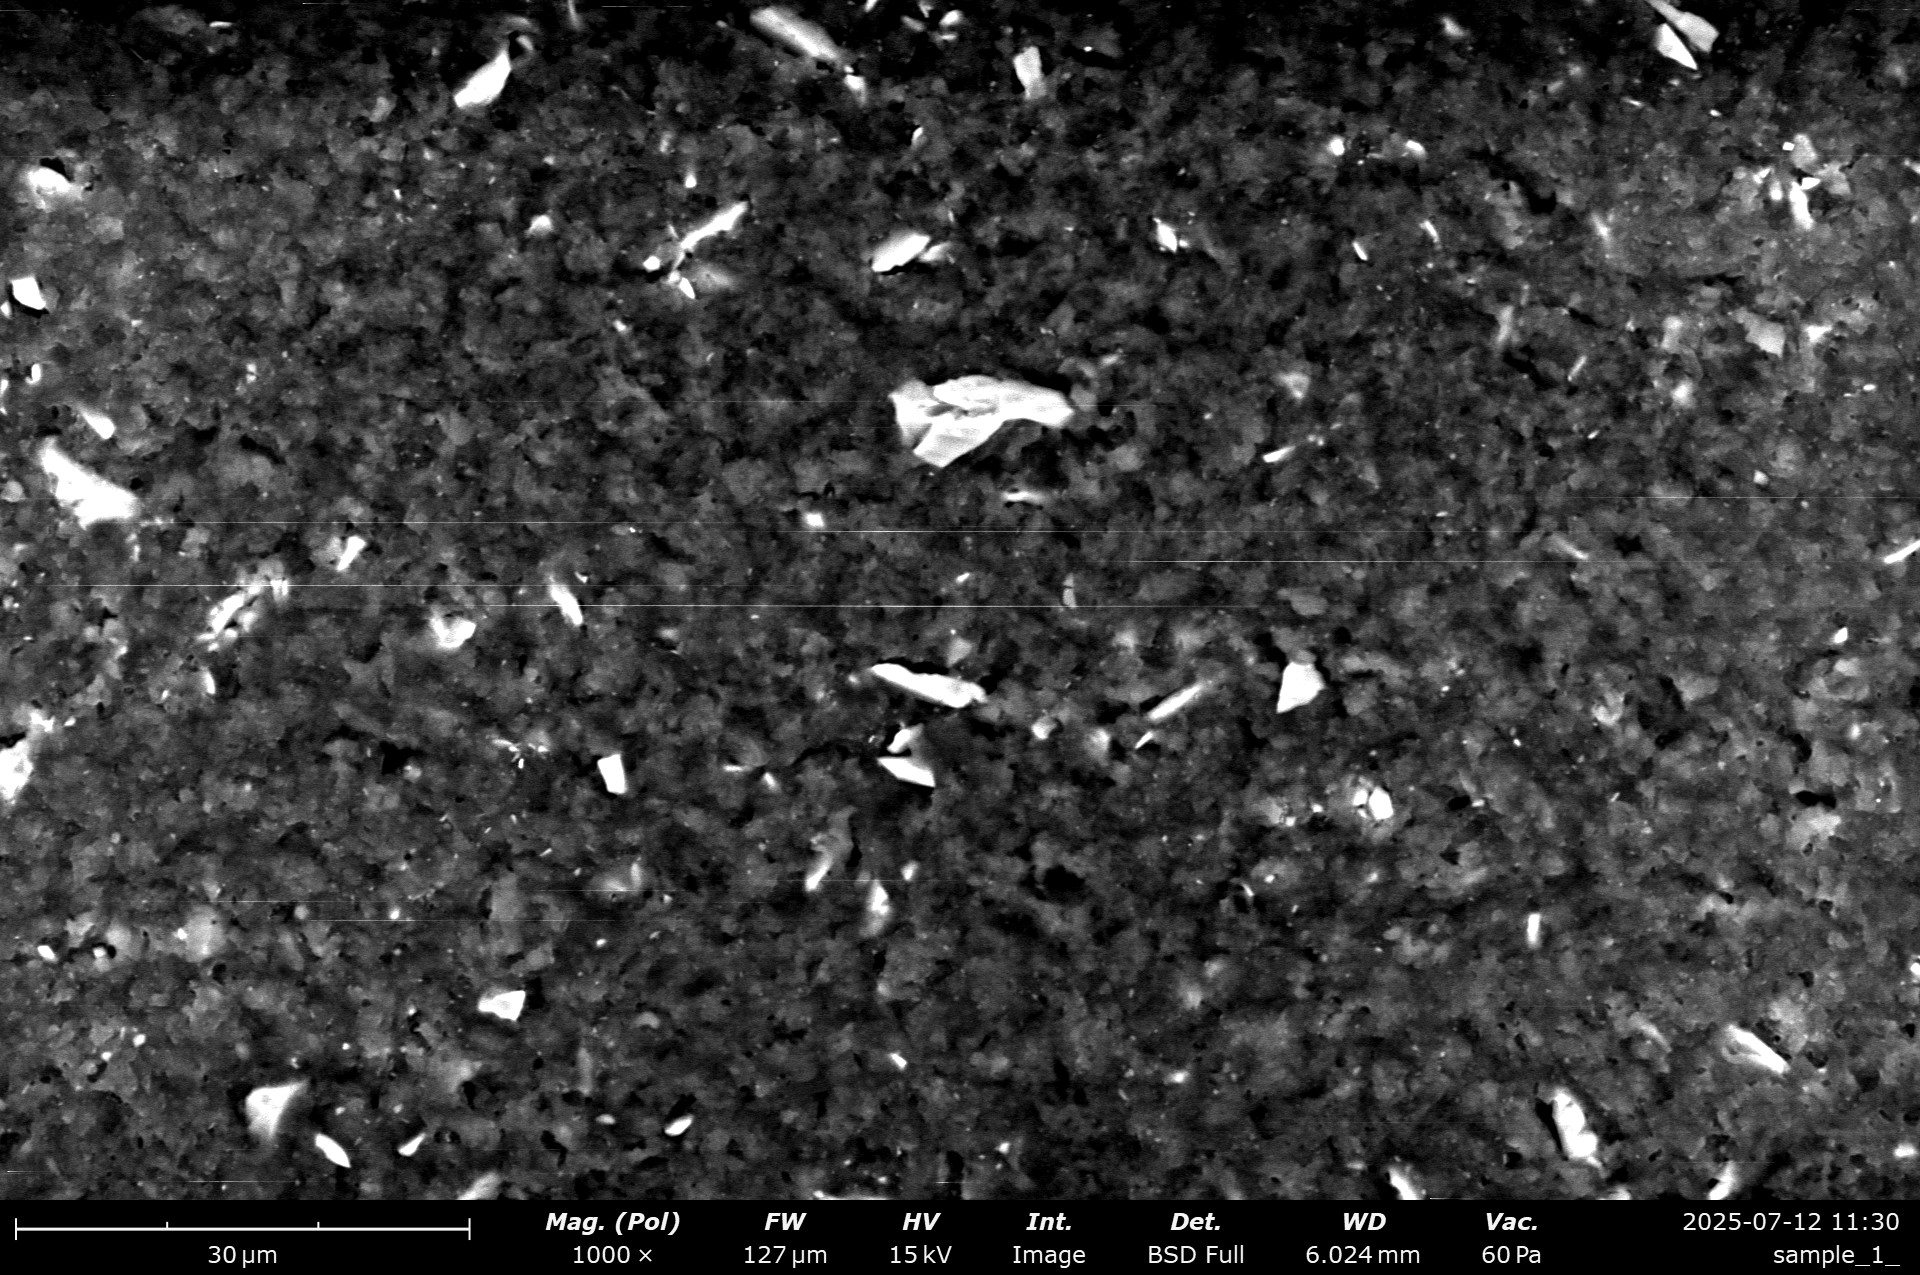
SEM micrographs of the FEPA 300 SiC powder dressed resin stone. The lighter coloured particles are SiC.
A very large number of evenly distributed, very bright particles is visible. Because of the used detector type (BSD), this means the particles consist out of heavier elements than the surrounding material. As diamond and resin both mostly consist out of carbon, this is alreadys a very good hint that we are looking at SiC. EDS analysis reveals this:


EDS analysis of the FEPA 300 SiC powder dressed resin stone. The lighter coloured particles are easily identifiable as SiC.
The finer grit SiC (FEPA 400) also shows a similar picture – evenly distributed, top layer embedded SiC particles.
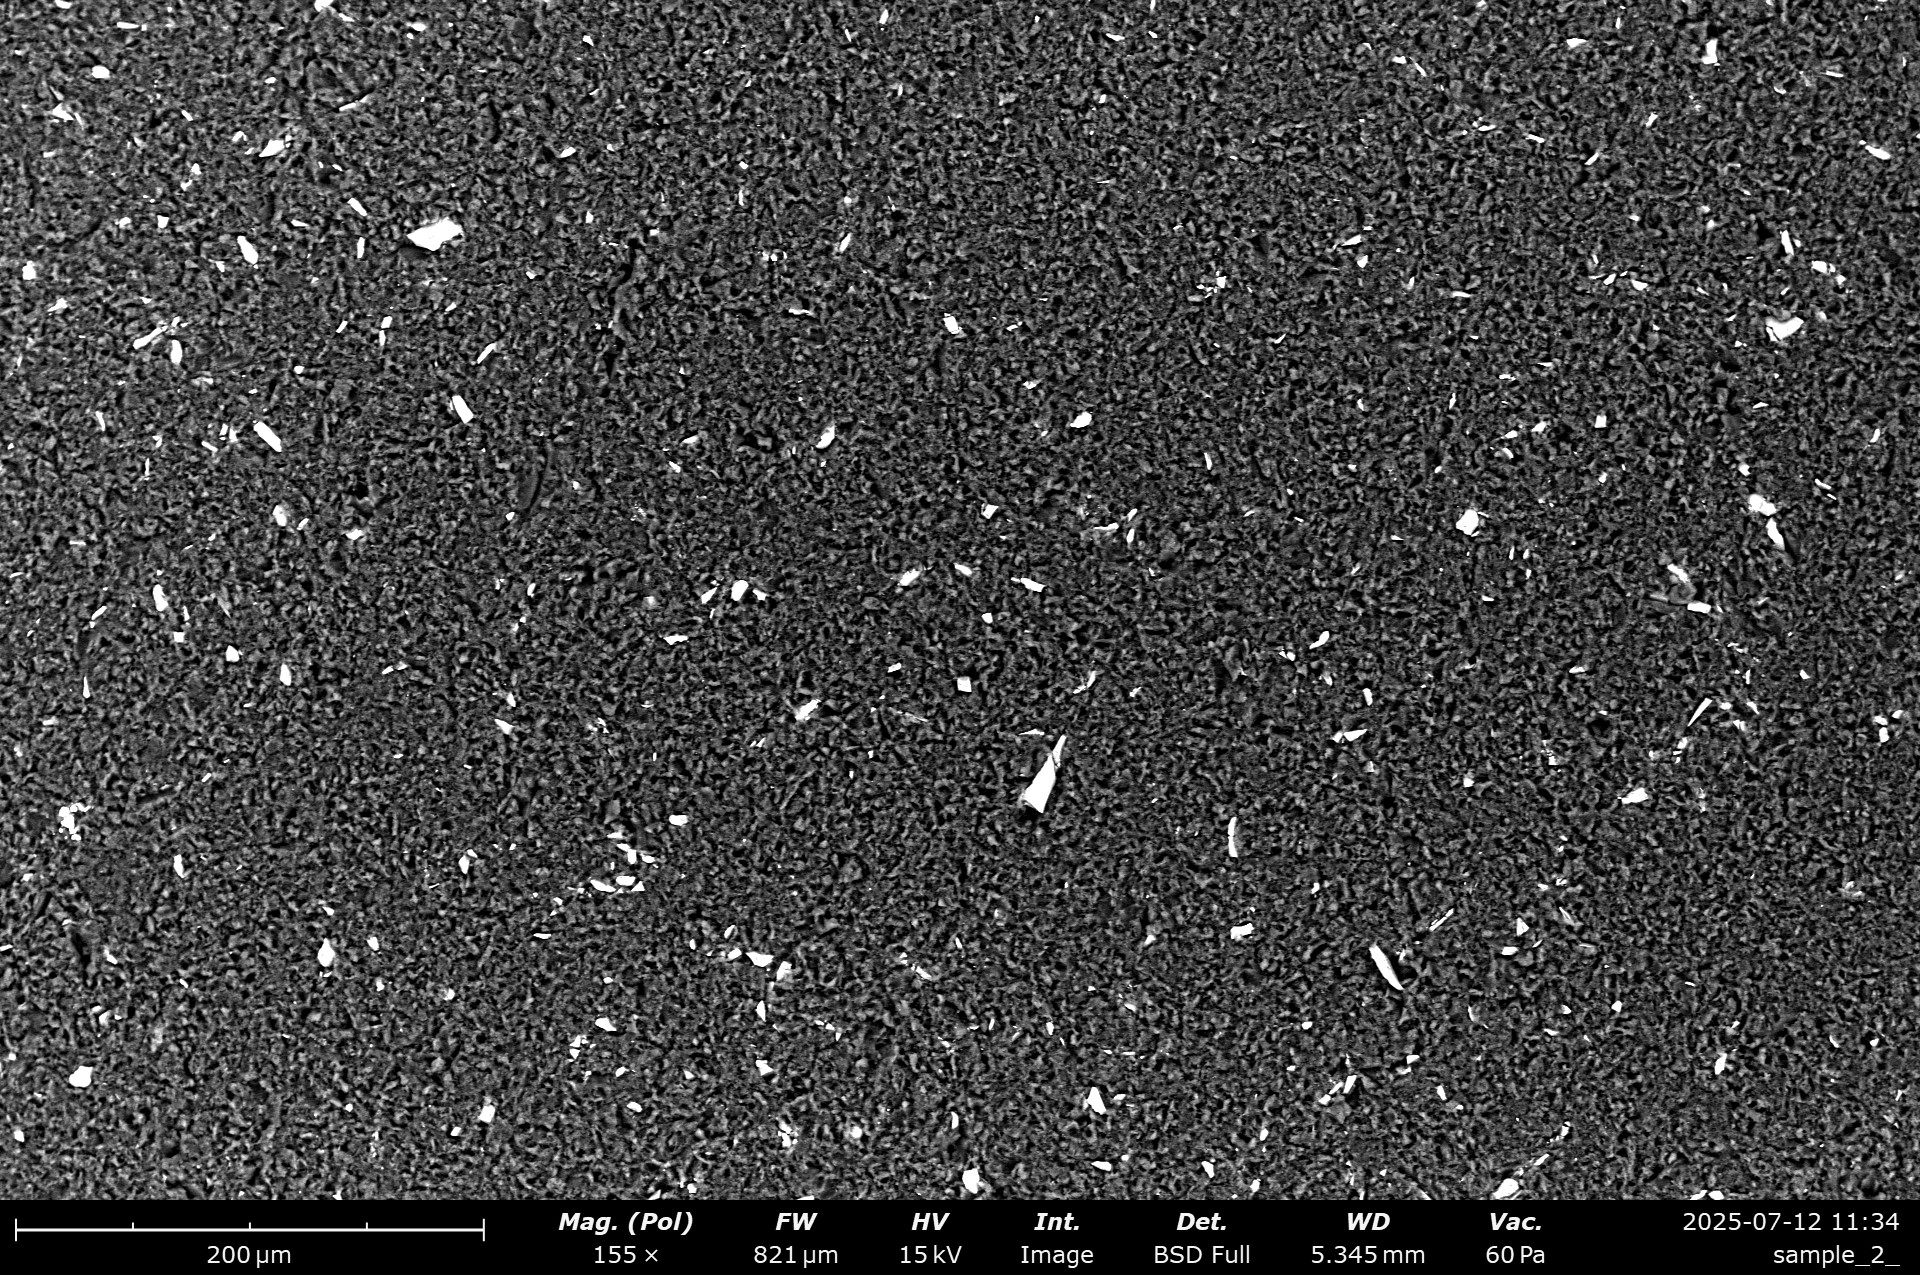
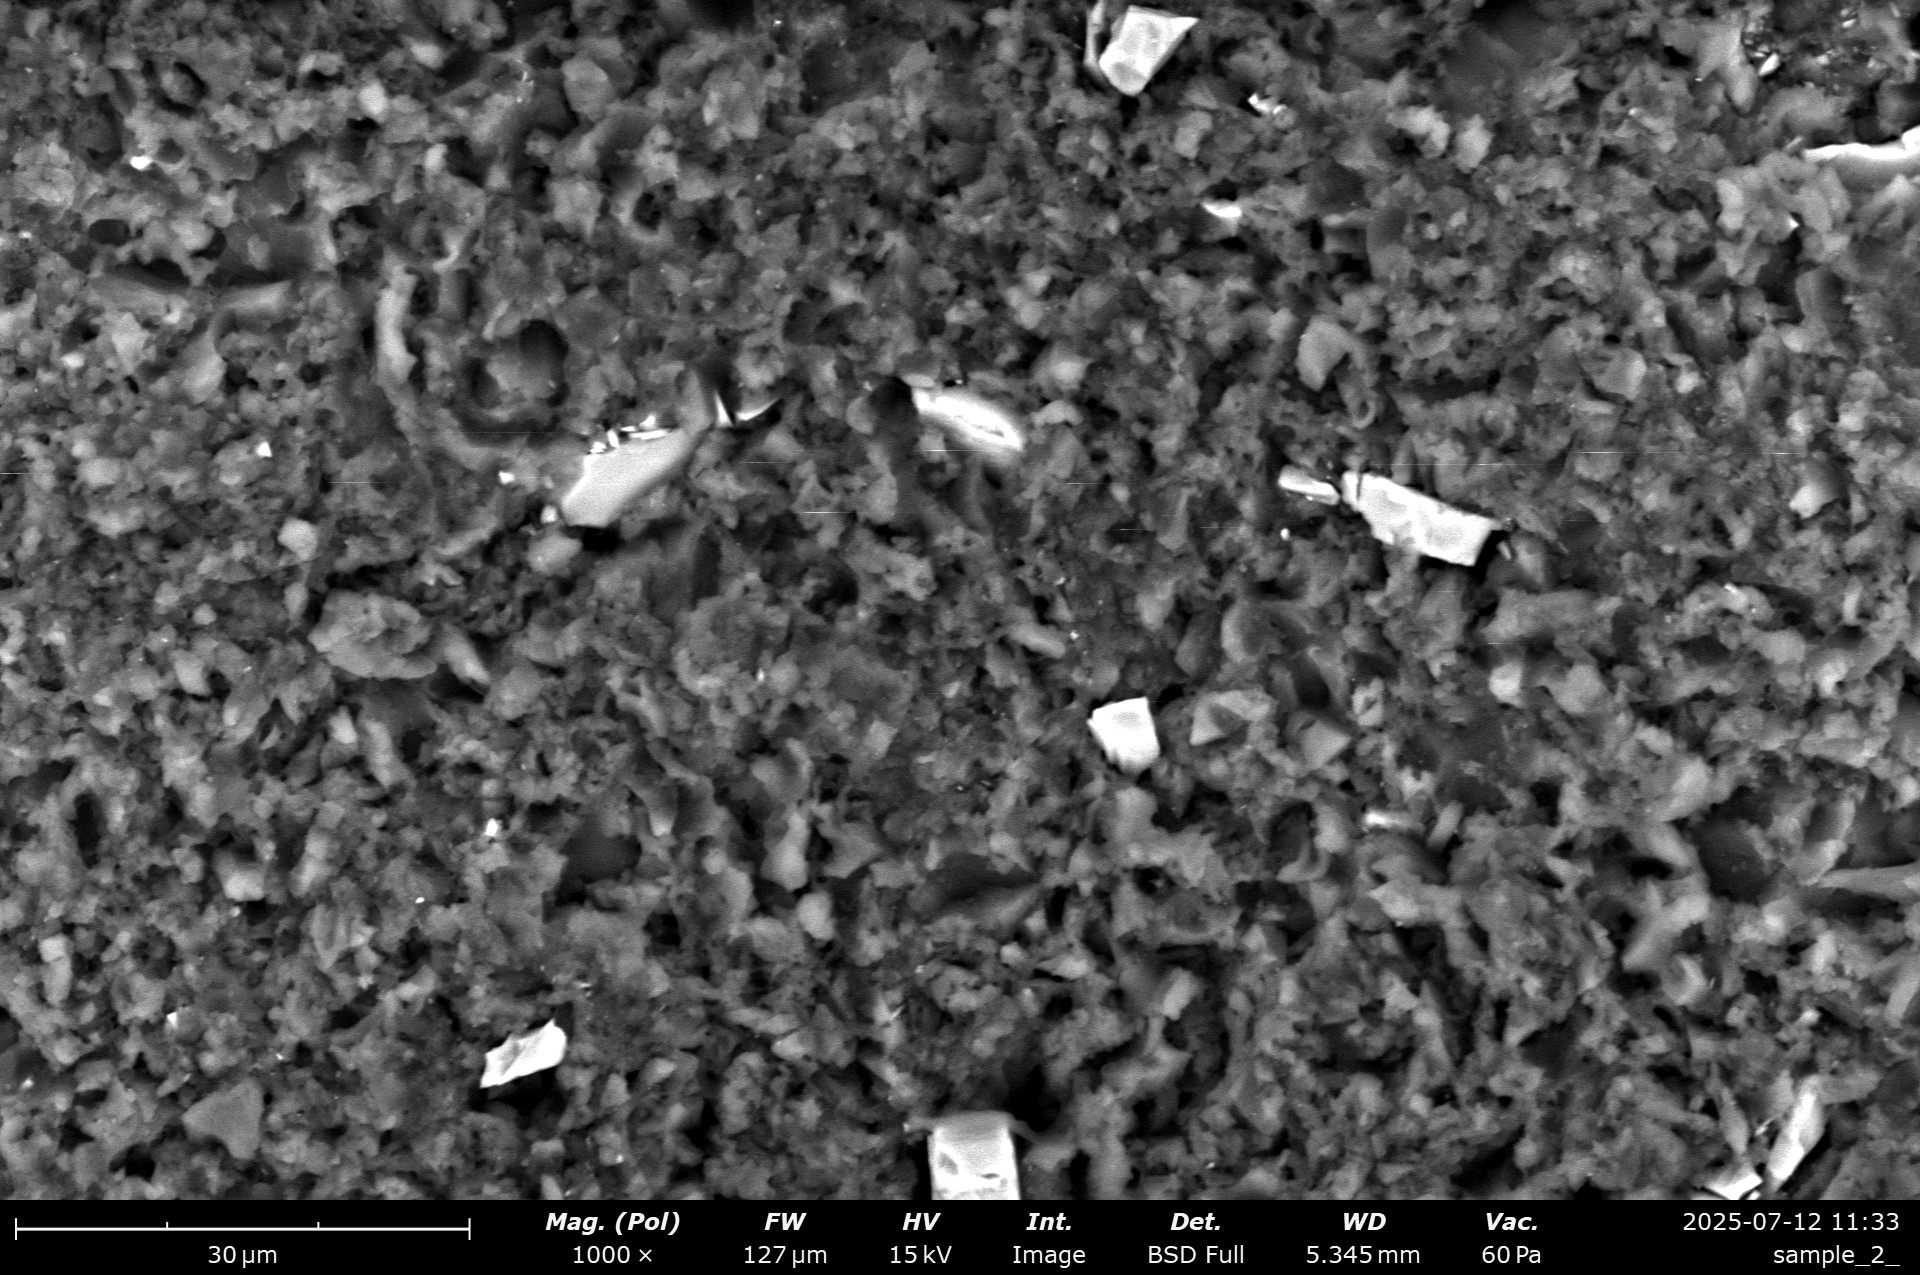
SEM micrographs of the FEPA 400 SiC powder dressed resin stone. The lighter coloured particles are SiC.
EDS analysis confirms these particles to be SiC again.

EDS analysis of the FEPA 400 SiC powder dressed resin stone. The lighter coloured particles are easily identifiable as SiC.
The finest SiC grit used, which is below the abrasive size (4.5 vs 10 µm diamond) also shows fine, embedded particles.
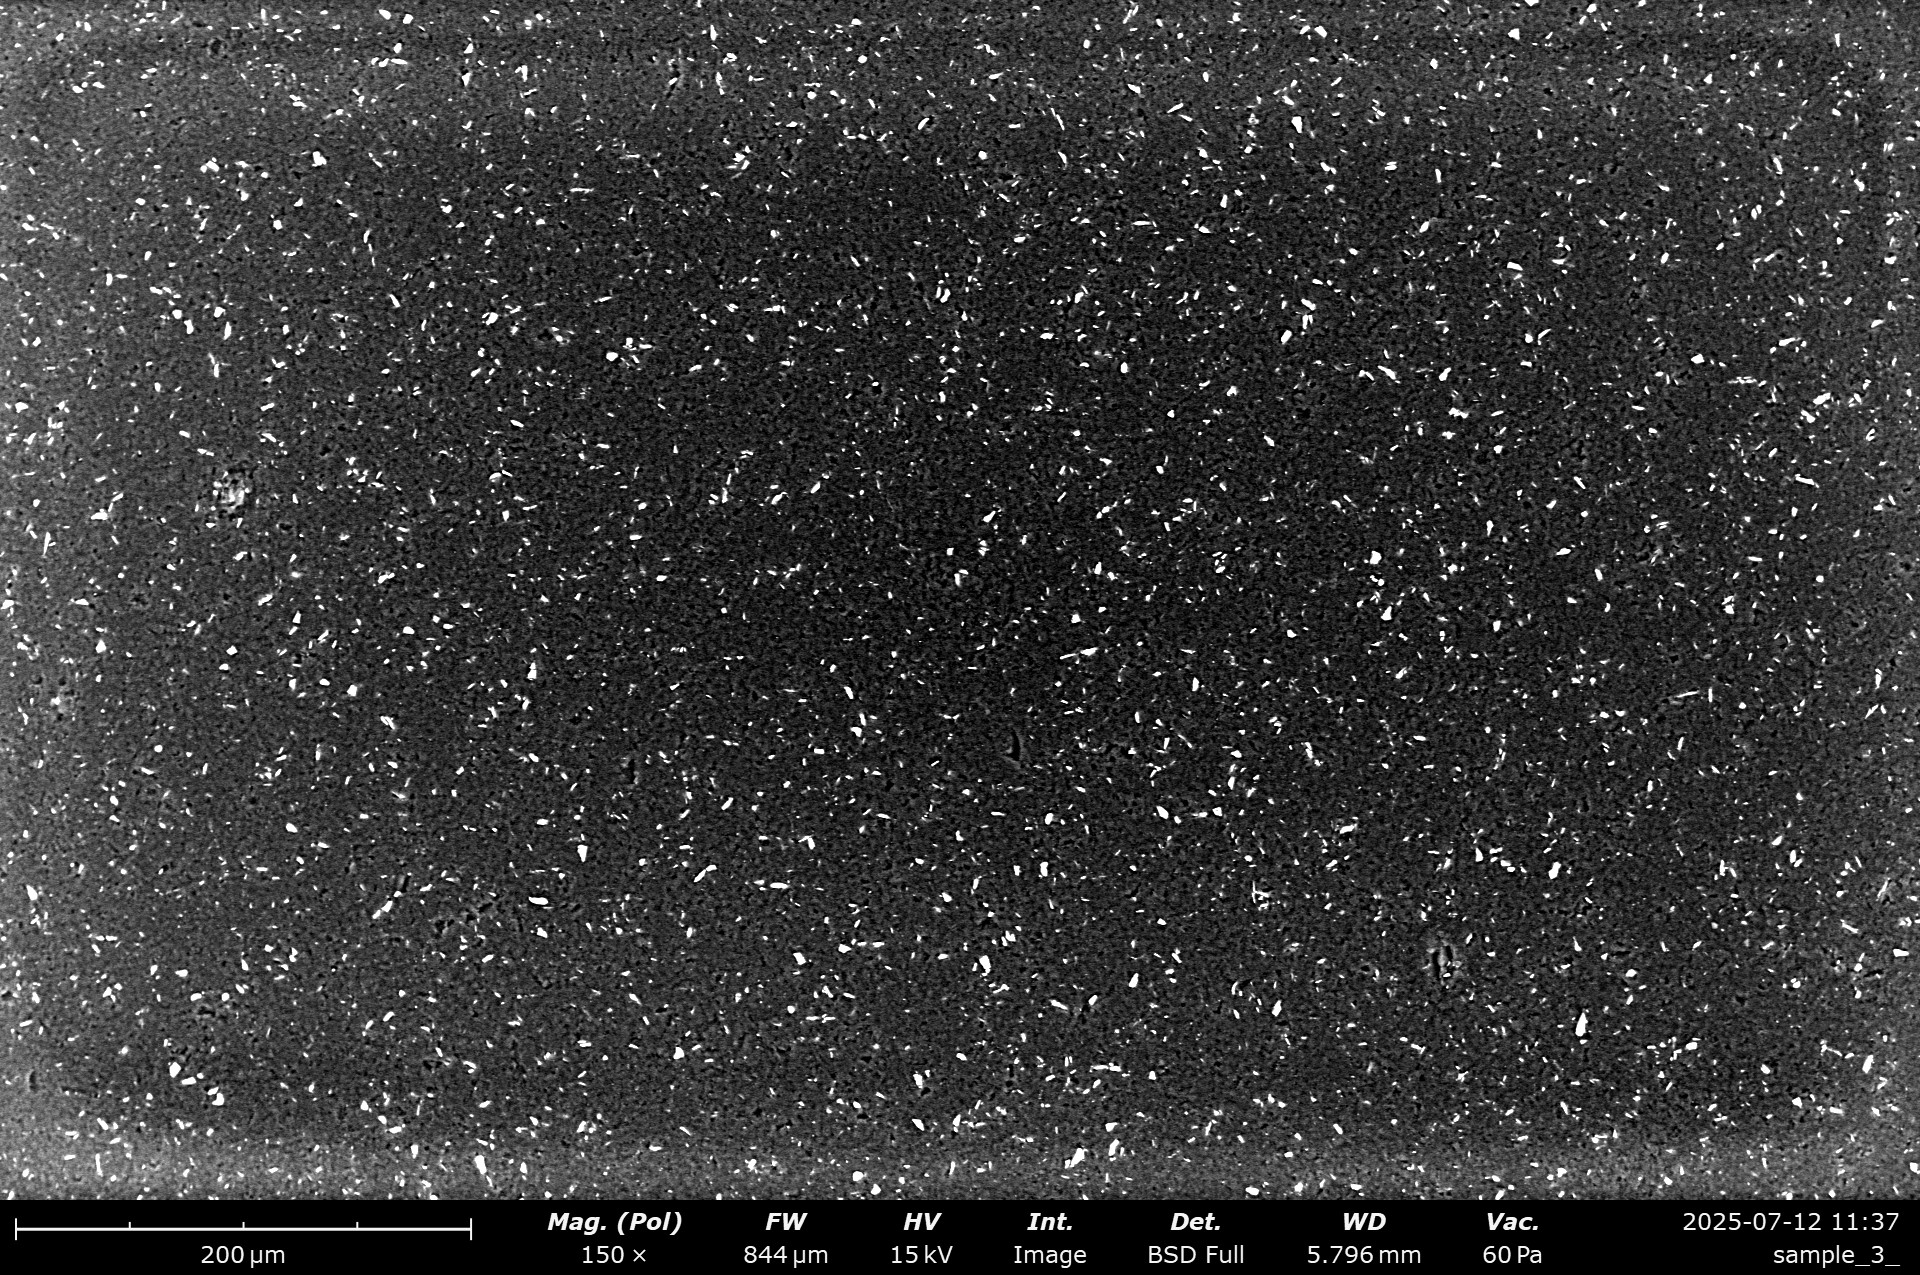

SEM micrographs of the FEPA 1000 SiC powder dressed resin stone. The lighter coloured particles are SiC.
EDS analysis also confirms that these are SiC particles.


EDS analysis of the FEPA 1000 SiC powder dressed resin stone. The lighter coloured particles are easily identifiable as SiC.
Next, I took the “expensive” route. The stone is made from 10 µm diamond powder, why not take that same-batch diamond powder to dress it? After all, it is an abrasive, and contamination can’t happen here…can it?

Optical micrograph of the dressed surface. Abrasive used: 10 µm diamond powder. Because of the low material removal rate, only a smaller section was dressed. The different area in the top left colour is from before-dressing. Instrument: Leica Emspira.
One thing of note is that the diamond slurry is pretty expensive to make, and it also is very slow in the dressing. I rubbed about twice as long as on the SiC slurry, and had a smaller section dressed. Nevertheless, it’s enough for SEM analysis!
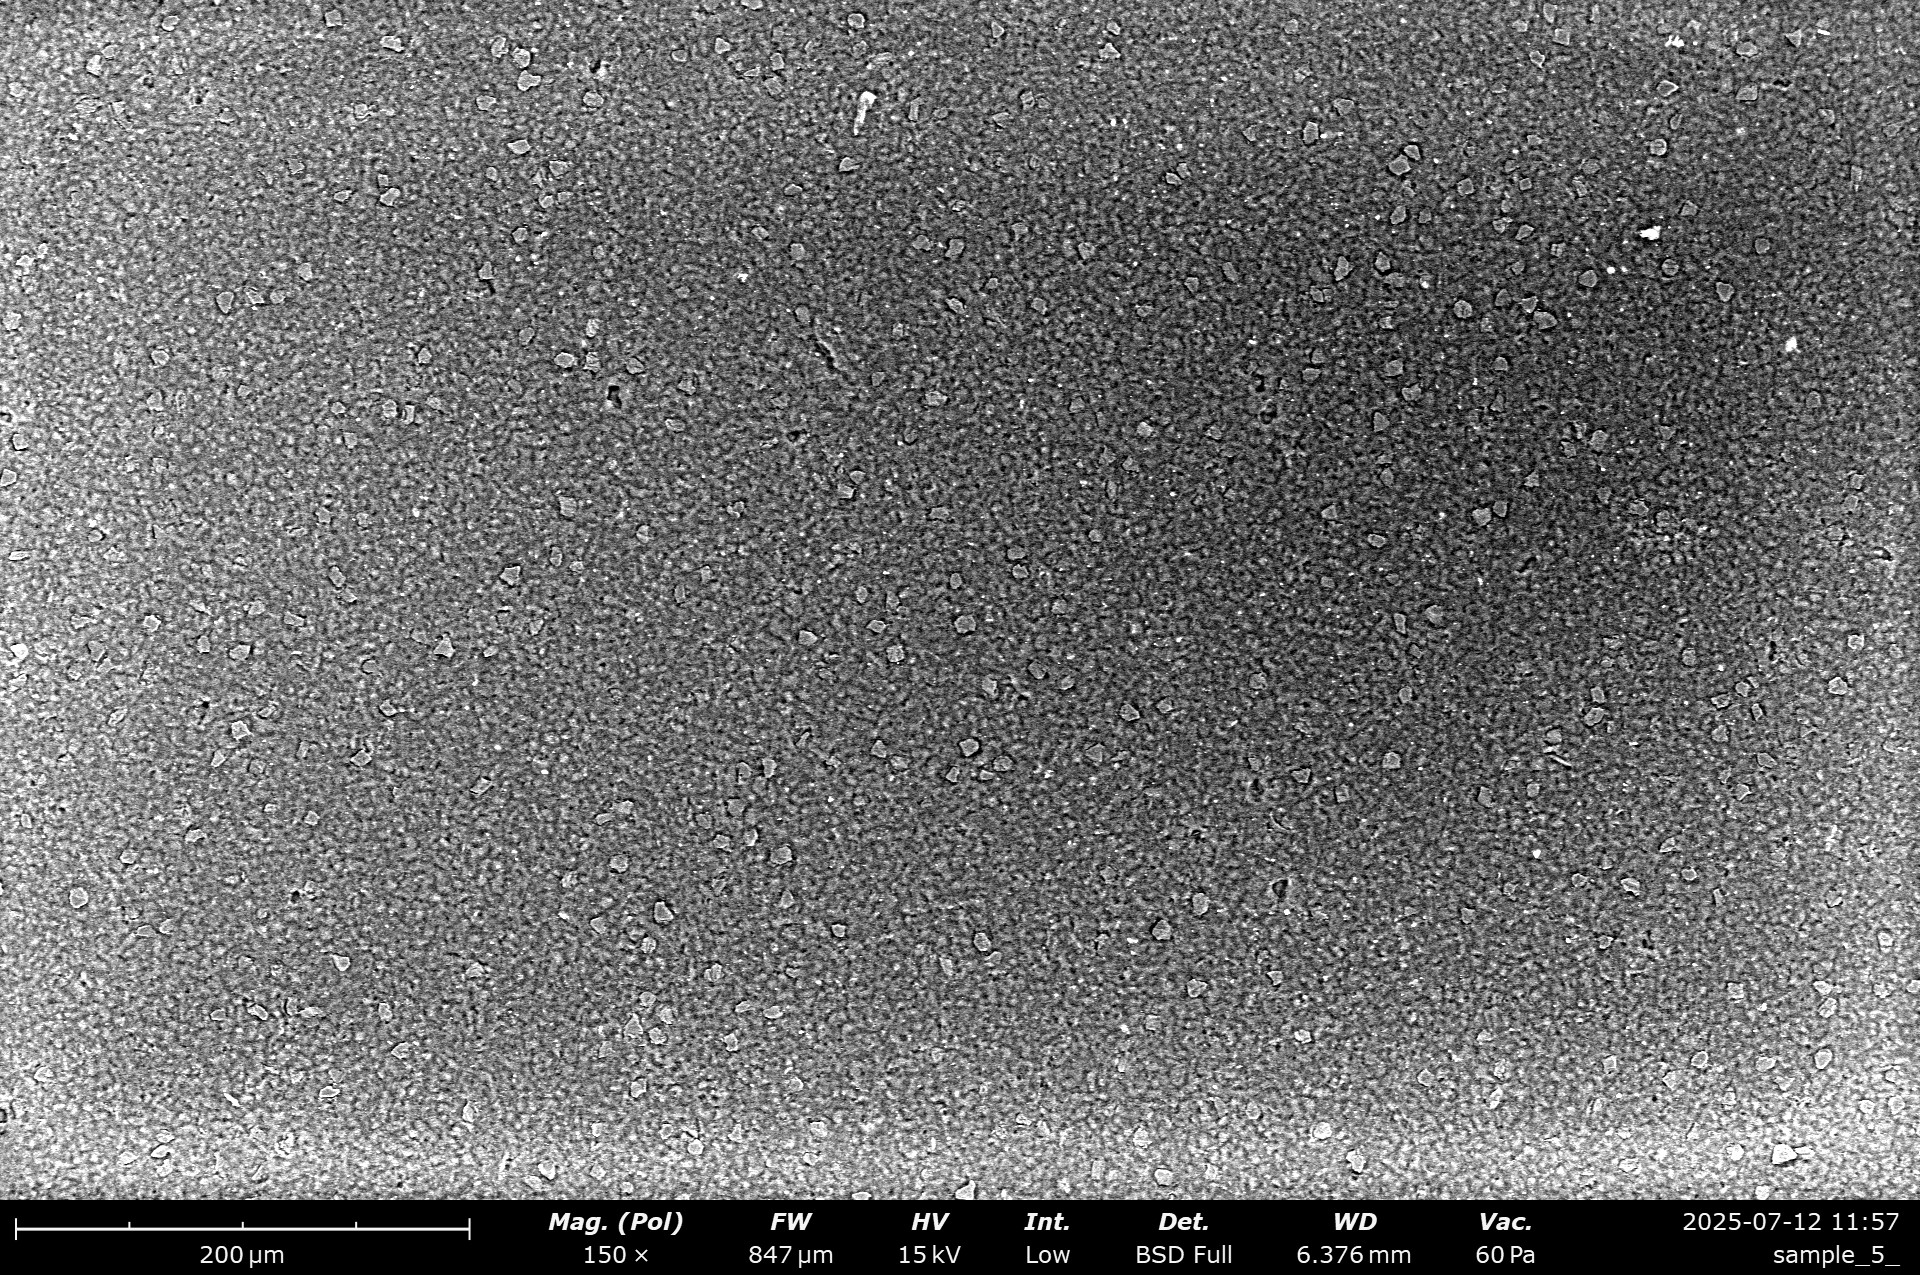

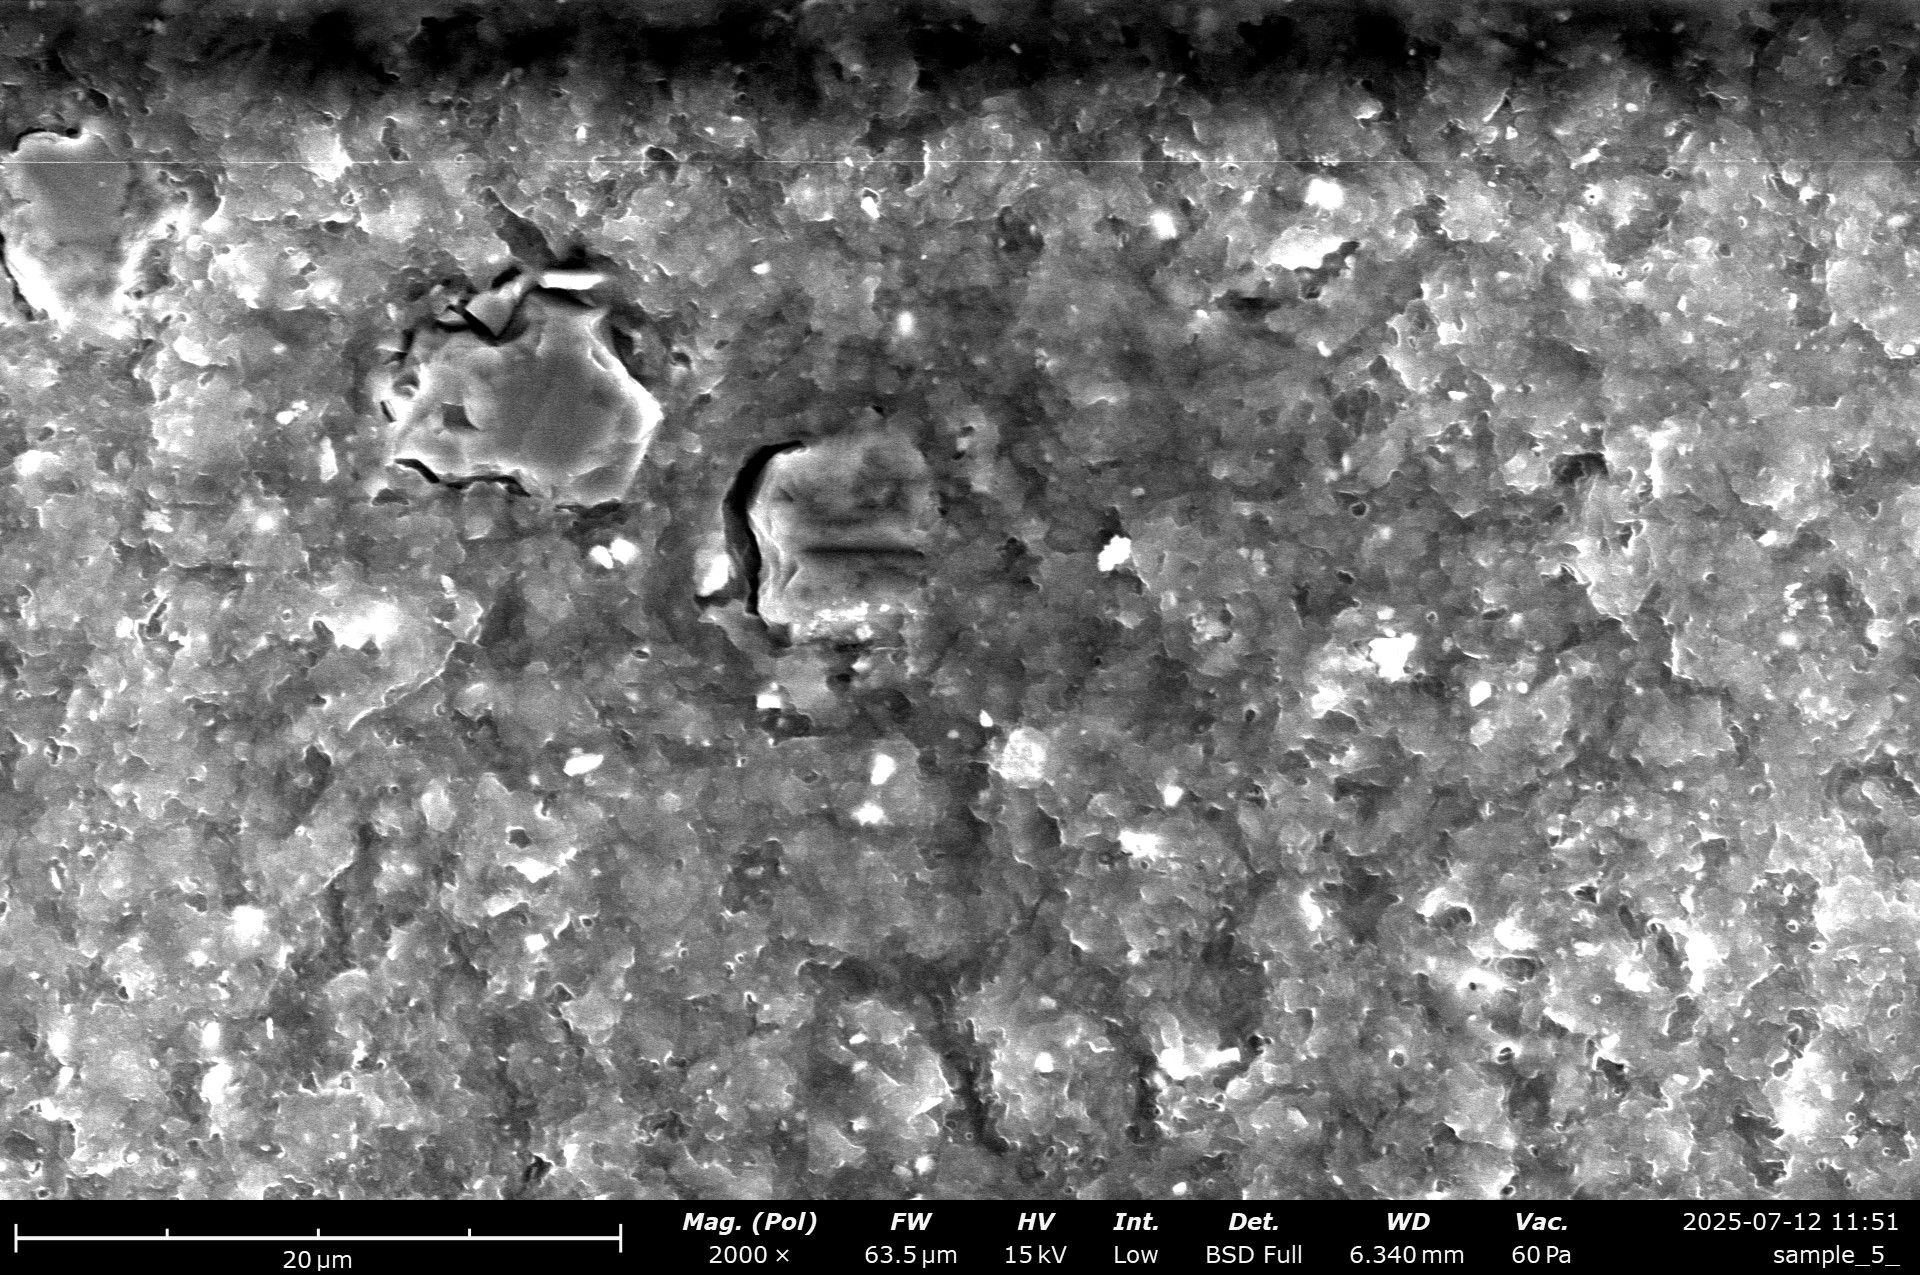
SEM micrographs of the 10 µm diamond powder dressed resin stone.
We can immediately see, that some diamond was embedded into the top surface. It’s visible as flat grains, that are all equally sized – this is different to how the actual resin stone looks like, where diamonds are always at different depths and peaking in or out. Moreover, if one zooms in very far, small, bright particles become visible. This is interesting, as they are sub 1 µm sized!

EDS analysis of the diamond powder dressed resin stone. The lighter coloured particles are identifiable as SiO2
EDS analysis shows that these particles consist out of oxygen and silicon. Spot analysis confirmed a ratio of 1:2, so this is likely SiO2 – the glass plate we used seems to have abraded and embedded itself into the stone. I find this very fascinating, as we didn’t really see these particles on the SiC dressed stones! Sub micron particles out of glass can be considered a health hazard. I would advise to wear a mask on all heavy abrasive actions!
II. Dressing on electroplated diamond plates
One pricey alternative is to use an electroplated diamond plate. The advantage here is that the abrasive is pretty firmly bound to the plate, so chance of contamination should be lower, and we can aid the process by dressing under running water, which will automatically flush between the two abrasive bodies. The downside is besides the cost of the plate a very large wear on the EP plate.

Optical micrograph of the dressed surface. Abrasive used: 600 grit EP diamond plate. Note the very even and homogenous surface with some very bright particles. Instrument: Leica Emspira.
Under the optical microscope, a few large, bright particles are visible.
I was hunting for these under the SEM, and while I mostly found a well dressed resin stone, a few of these larger particles were also visible!
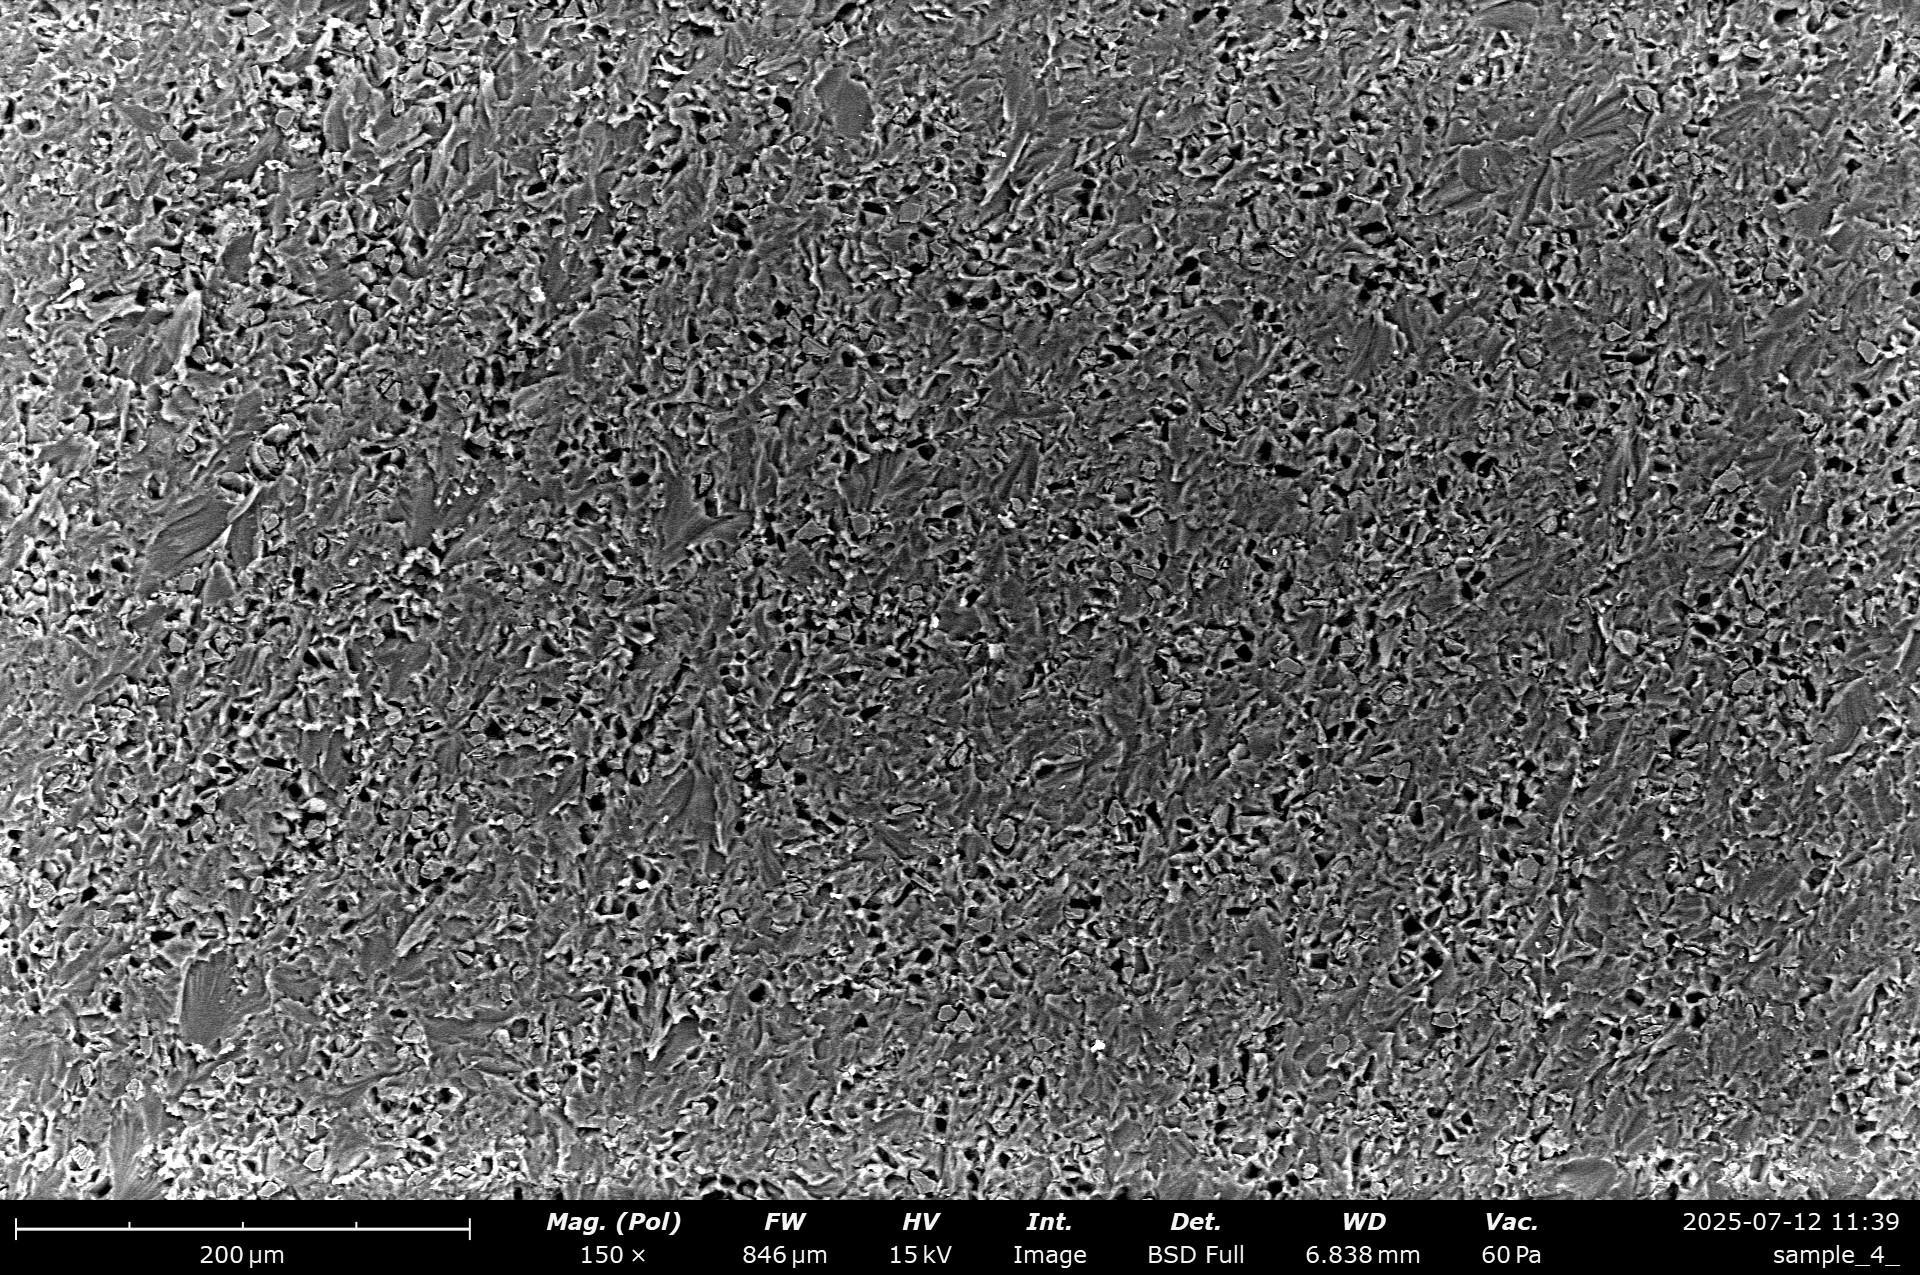


SEM micrographs of the EP diamond plate dressed resin stone.
The particle size of > 25 µm is consistent with the 600 grit EP stone used.


EDS analysis of the diamond EP 600 grit dressed resin stone. The large particles identify as carbon, so are likely diamond particles that have come loose from the EP stone.
While it’s a nice dressing result, and the contamination is rare, these diamond particles are 3x the size of the resin stone diamonds. These particles will continuously create very deep scratches.
III. Dressing on SiC sanding paper
Lastly, I dressed a sample on some SiC sanding paper. This was done with a bit of ethanol as a lubricant. The SIC paper was by far the quickest way to dress the surface, but left some deeper scratches visible on the surface:

Optical micrograph of the dressed surface. Abrasive used: FEPA 1500 SiC sanding paper. Note the visible scratches. Instrument: Leica Emspira.
SEM analysis reveals not only these scratches, but also some brighter particles. Moreover, instead of really dressing the surface, it also removed all surface layer touching diamonds! We are left with a very porous surface with few diamonds visible. I would guess that this surface will immediately clog with swarf.
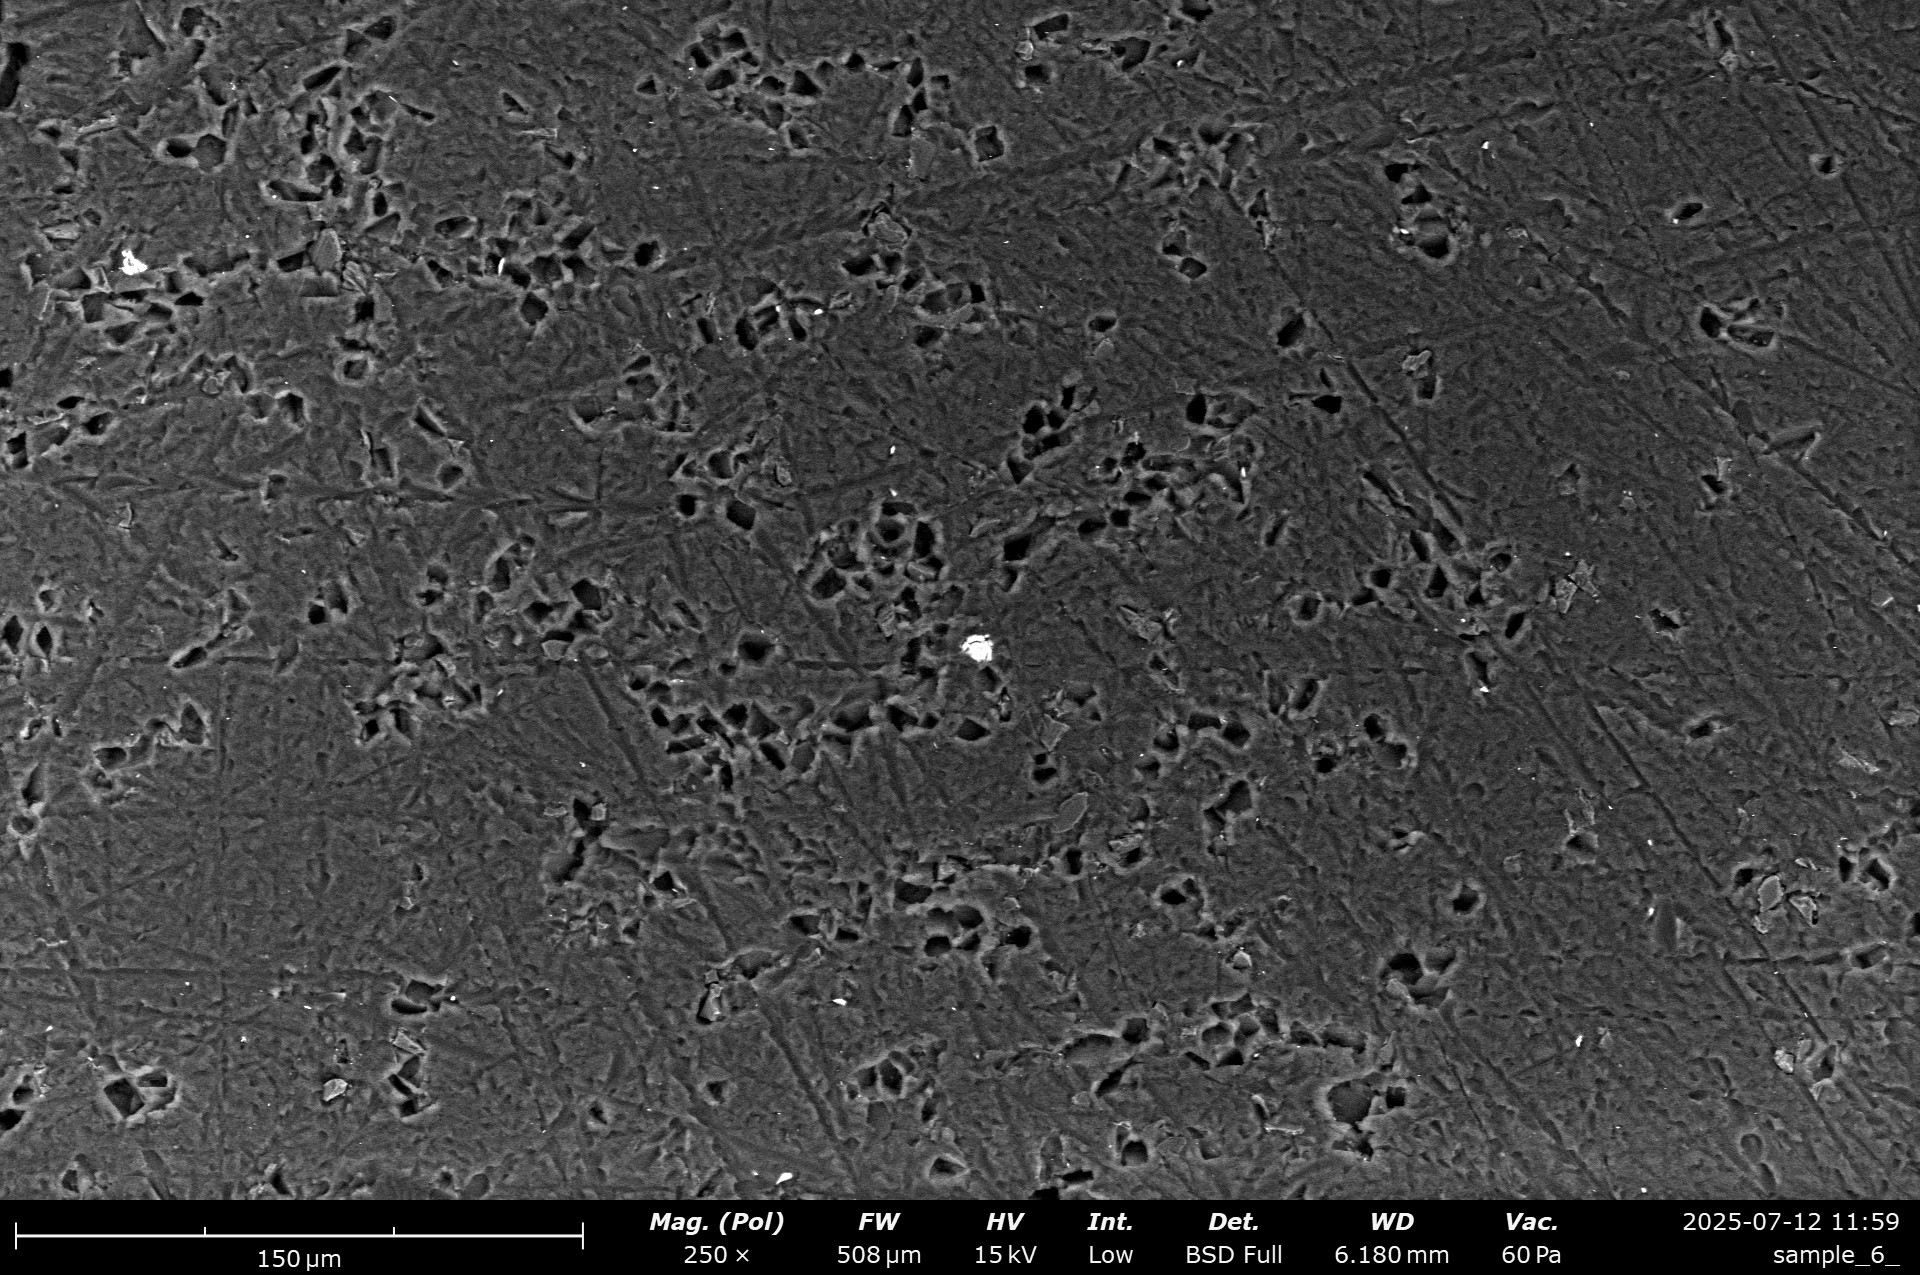

SEM micrographs of the FEPA 1500 SiC sanding paper dressed resin stone. The lighter coloured particles are SiC.
EDS analysis confirms the bright particles as SiC.

EDS analysis of the FEPA 1500 SiC sanding paper dressed resin stone. The lighter coloured particles are easily identifiable as SiC.
Conclusion
I am quite surprised. All analysed dressing methods leave us with contamination. I would say in aspects of having the best performance, the diamond slurry dressed stone is probably king – no larger or other particles are introduced. The minuscule amount of glass should be easily avoided by wearing personal protective equipment – which in my opinion, you should always wear during dressing.
The SiC dressing embedded foreign particles. At sizes larger than the diamond, this will leave you with a stone that produces deeper scratches. At a size smaller than the diamond abrasive, you’ll just increase the grinding pressure, and make your diamond stone slower.
The SiC sandpaper was surprisingly effective, considering it was a finer grit. Unfortunately, it also removed the diamonds from the matrix, a first here. I wouldn’t recommend it here!


