This is part of a series of blog posts – looking into the appearance and composition of commercially available sharpening stones. If you are interested in the previous episodes, check out the archive for them.
If you have some suggestion on what I should look at next, or want to share your super secret DIY stones, I could be persuaded to open the bag of analytical devices… hit me up on Instagram under @marvgro for that.
Disclaimer: I’m not for sale. Every review you see on this blog is bought with my own money. I have no affiliation to any manufacturer.
Review
Today’s sharpening stone is the smaller grit brother of the last instalement in this series – the PDTools Vitrified Diamond in grain size 40/28 µm. Typically, this grit size gives nice, toothy edges – ideal for cooking knives, especially if reworked with a very fine diamond to further refine the apex. With so many parts of this “brief study”, one notices a pattern in my stone purchases: it’s either very coarse, a medium grained stone such as this one here, or a very fine one. I do this, because I am interested in how the manufacturers manage to deal with challenges such as grain retention, cost vs concentration considerations, but also agglomeration. I do not test full series of stones, because frankly: I purchase these stones with my own money; most stones see my blog review, and then are spending the rest of their life in a drawer and don’t get used.
Onwards to the review of this vitrified diamond stone!


Optical micrographs of the PDT Vitrified Diamond 40/28 stone. Instrument: Leica Emspira
The optical micrographs are already very interesting. There’s definitely some much larger than expected grains in this stone – but also, quite a bit of diamond can be made out. This will be one interesting stone!


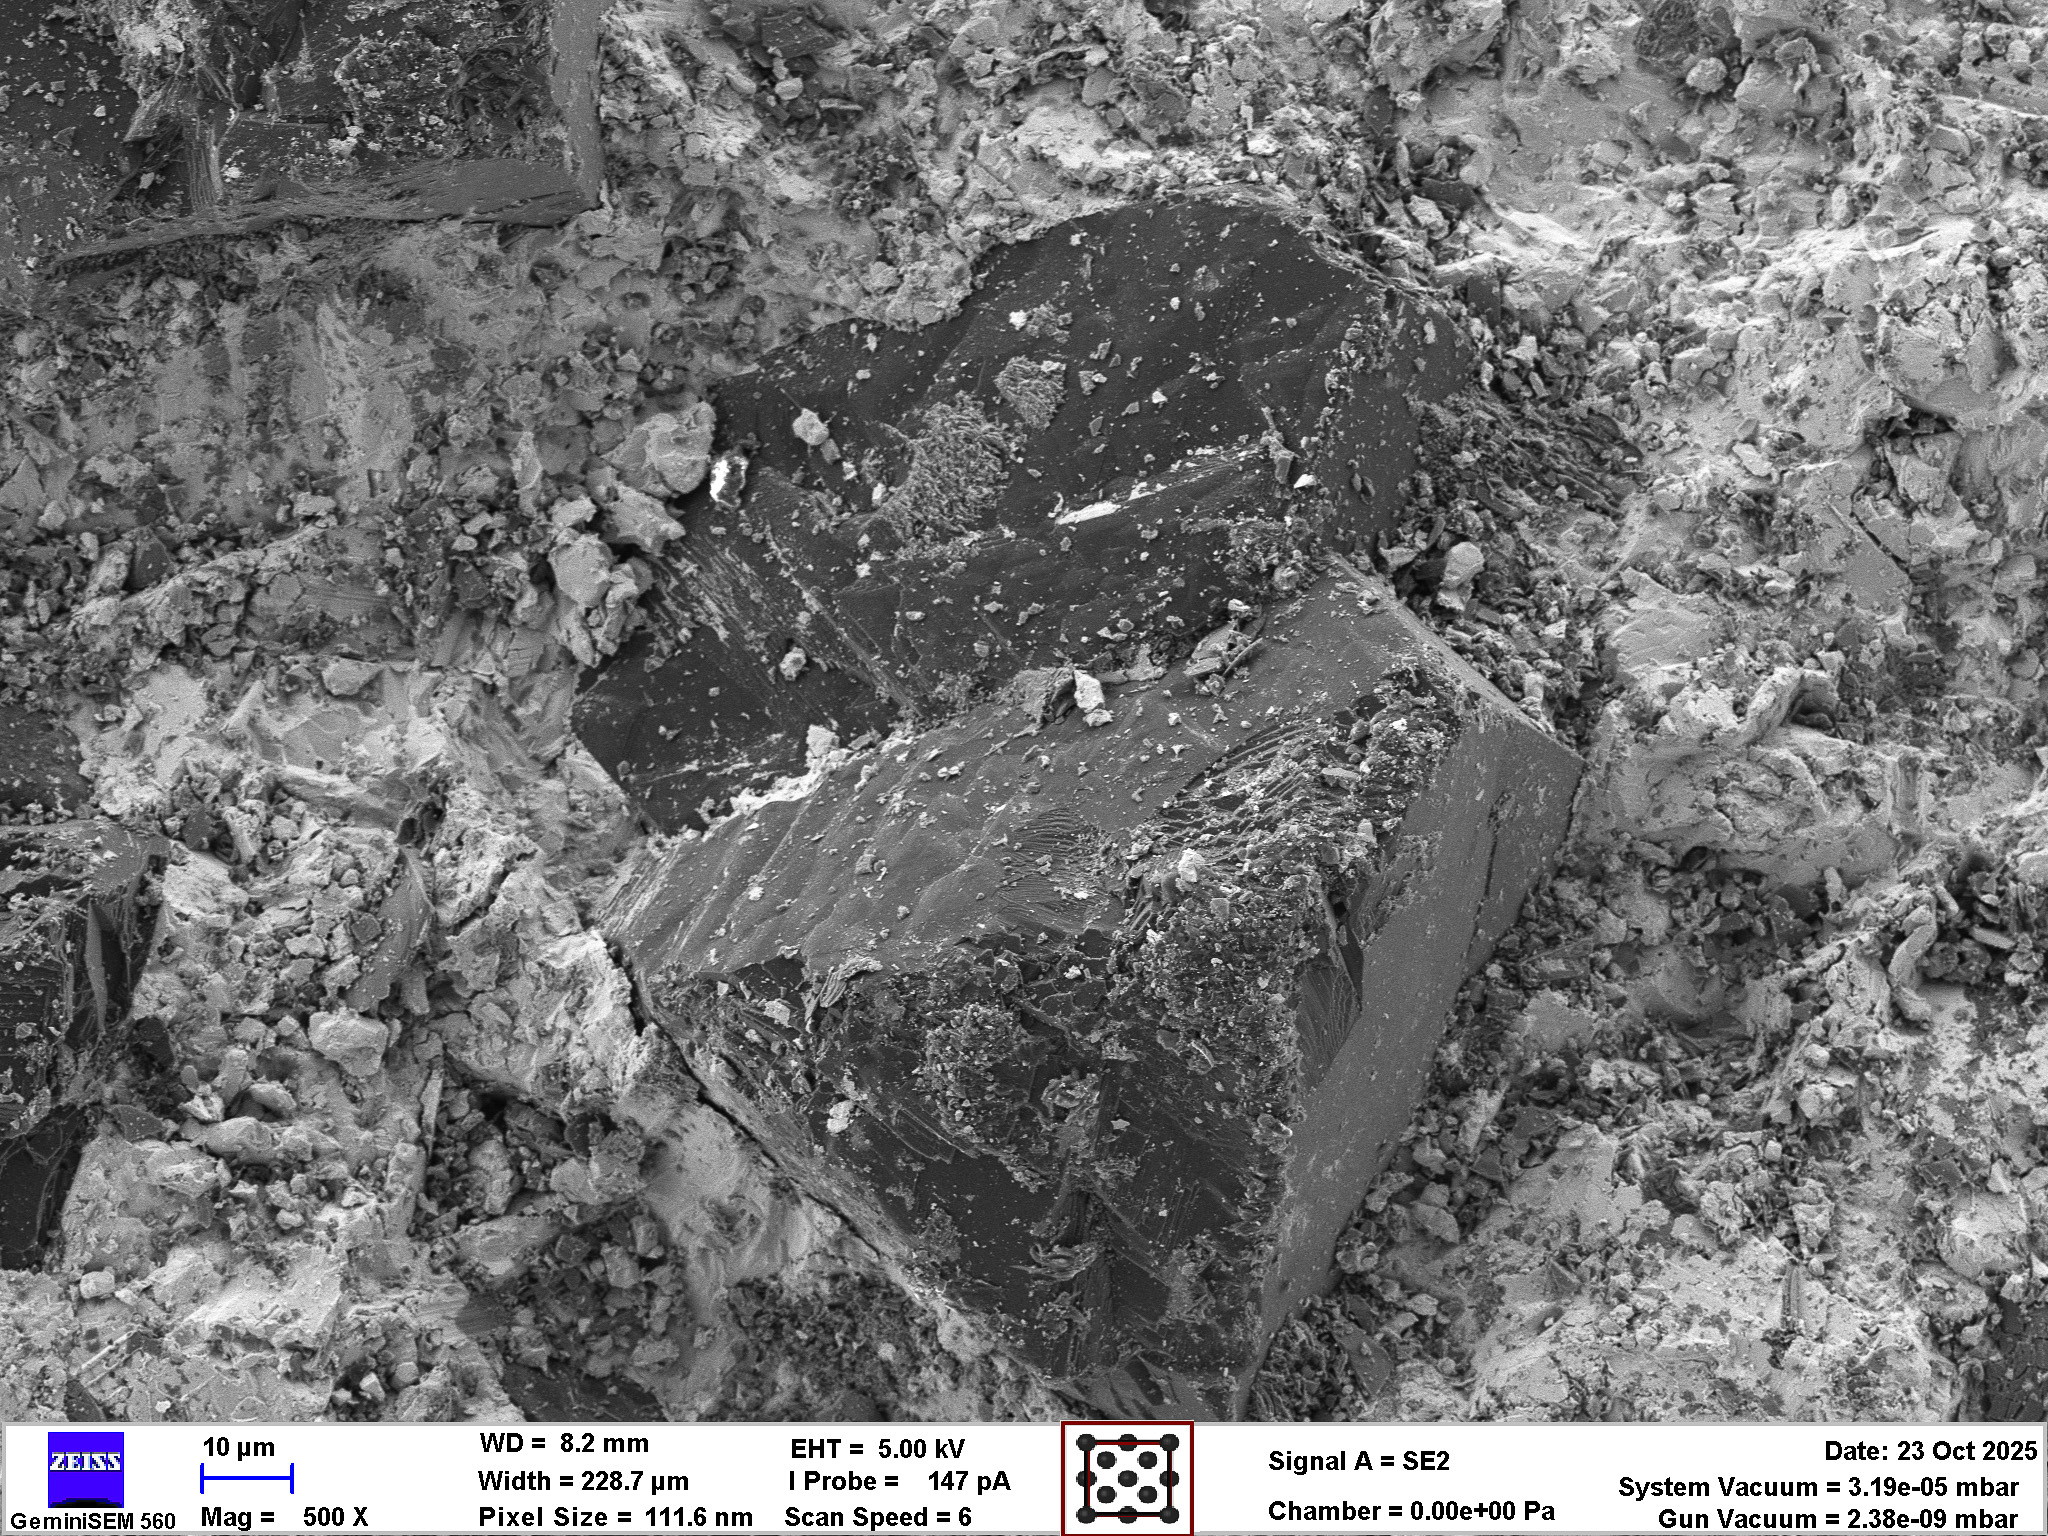
SEM micrographs of the PDT Vitrified Diamond 40/28 stone. Instrument: Zeiss GeminiSEM 560.
The view from the optical microscope is once again confirmed – between the diamond particles, which clump together a bit, are much larger grains visible. To me, the vitrified bond looks very similar to the one in the 100 micrometre stone review – not super high vitrification, with lots of filler particles. Seems like the same size particles was chosen for this finer stone.
Let’s look at the chemical composition! For this we are going to use an advanced SEM technique called EDS. If you want to know more about this, I’ve written extensively about SEM microanalysis here on this blog.


EDS analysis of the stone. Instrument: Oxford Ultim Max ∞ 40mm2 EDS sensor. Note that our EDS sensor doesn’t show elements lighter than boron.
The matrix is a standard vitrified bond, consisting of different oxides. The diamond is not as nicely distributed as in the coarser brother. It is quite difficult to mix powders well – here, we can find spots that are nearly empty of diamond, and others where it nearly clumps together. I find the addition of titanium once again quite curious – this probably gives the bond some tensile strength when used in CNC applications? Larger, hard oxide particles can also be easily spotted – these are several times larger than the diamond inside the stone.
In order to evaluate the sharpening performance and material removal mode of this stone, a blade was sharpened with it. I am using a standardised testing procedure, read about it here. Nevertheless, it’s 65 HRC M398, and sharpened to 17 DPS with resin bond diamond stones down to 10 µm. Afterwards, the tested stone is used, first in a back and forth movement until the surface becomes homogenous, and then alternating strokes (5-5-3-2) on each side, for a total of 20 strokes towards the apex per side. No pressure is applied but the weight of the apparatus.
The edge is then analysed in the electron microscope for breakouts and morphological appearance.


SEM micrographs of the edge finished with the PDT Vitrified Diamond 40/28 stone. Instrument: Thermo Fischer PhenomXL SEM.
Uff. I’m not really sure what to say here. The bevel shows some deeper scratches, also some scratches are not very straight – this is typically the sign of a particle coming loose and rolling around. The real issue I find in the apex – just like with the coarse vitrified stone, we do not have a clearly defined, cut apex, and also not really a formed burr. Instead, the whole apex is pushed over – plastic deformation instead of material removal. This structure feels to the thumb like a burr – but actually is not, and will make subsequent, finer grit sharpening steps more difficult, as they will have to abrade more material. I’m once again a bit disappointed in this one – vitrified stones have a near-mythical reputation, and this one for sure lives up to the hype created by paid youtubers – something that feels like a burr is formed in very few strokes. At high magnifications, this turns out to not be a burr, but bending of the apex and some scratched bevel. This is once again shown in the optical pictures, which also reveal the massive amount of scratches on the blade:


Optical micrographs of the blade sharpened with the PDT Vitrified diamond stone. Instrument: Leica Emspira