Blog

  • A brief study on sharpening stones – Part 63 – Edge Pro DiamondMax 5 µm (Diamond, Resin)

    This is part of a series of blog posts – looking into the appearance and composition of commercially available sharpening stones. If you are interested in the previous episodes, check out the archive for them.

    If you have some suggestion on what I should look at next, or want to share your super secret DIY stones, I could be persuaded to open the bag of analytical devices… hit me up on Instagram under @marvgro for that.

    Disclaimer: I’m not for sale. Every review you see on this blog is bought with my own money. I have no affiliation to any manufacturer.

    Review

    In the last part of this series, we took a look at the brand new DiamondMax 80 Grit (160 µm) from Edge Pro. The review turned out to be quite the disappointment – the stone was suffering from heavy grain loss. Now, while it definitely is possible to make a resin stone at that grain size that works nicely, the main application of resin bond sharpening stones is the finishing – this is after all something where they shine. Our next look at this new series is the exact opposite end of the spectrum – the Diamond Max 4000 grit (5 µm). I’ve had a Diamond Matrix stone in a previous review.

    I’d advise you to check out my review on the 80 grit first:

    The manufacturer of the stones, David from CGSW has meanwhile commented under that blog post and given a more detailed insight into the increased diamond ratios. As this is very interesting, I’d like to quote him here:

    “To be clear, all Matrix stones have had more than 50% diamond to resin content by weight in them, and I have made every single one of them, so I can say this with confidence. The 80 grit Max stone has a 2.5 times higher concentration of diamonds, the 250 2.2 times higher, the 450 through 1700 have 2 times higher, and the 4000 1.8 times higher concentration of diamonds. For perspective, if they started out at 50/50, then 67/33 is double the concentration. I put the maximum amount of diamonds in the Max stones as is feasible for this resin. If I put more diamonds in this resin I run into processing problems.” David from CGSW, commenting on my blog (Part 62) on the 24th of May 2026

    This is clarifying a point, as it doesn’t mean these contain twice the amount of diamond, it just means the ratio has shifted – 67% by weight is after all just 35% more diamond.

    The original Diamond Matrix in 5 µm size is one of the stones I consider very, very good. My major issues back then was the slow speed – let’s take a look at the new DiamondMax in 5 µm!

    As always, we will start under the optical microscope:

    Optical micrographs of the Edge Pro Diamond Max 5 µm stone. Instrument: Marvscope

    The stone has a very homogeneous, regular appearance. The diamond can barely be made out at this magnification – just like I would expect of a 5 micron stone!

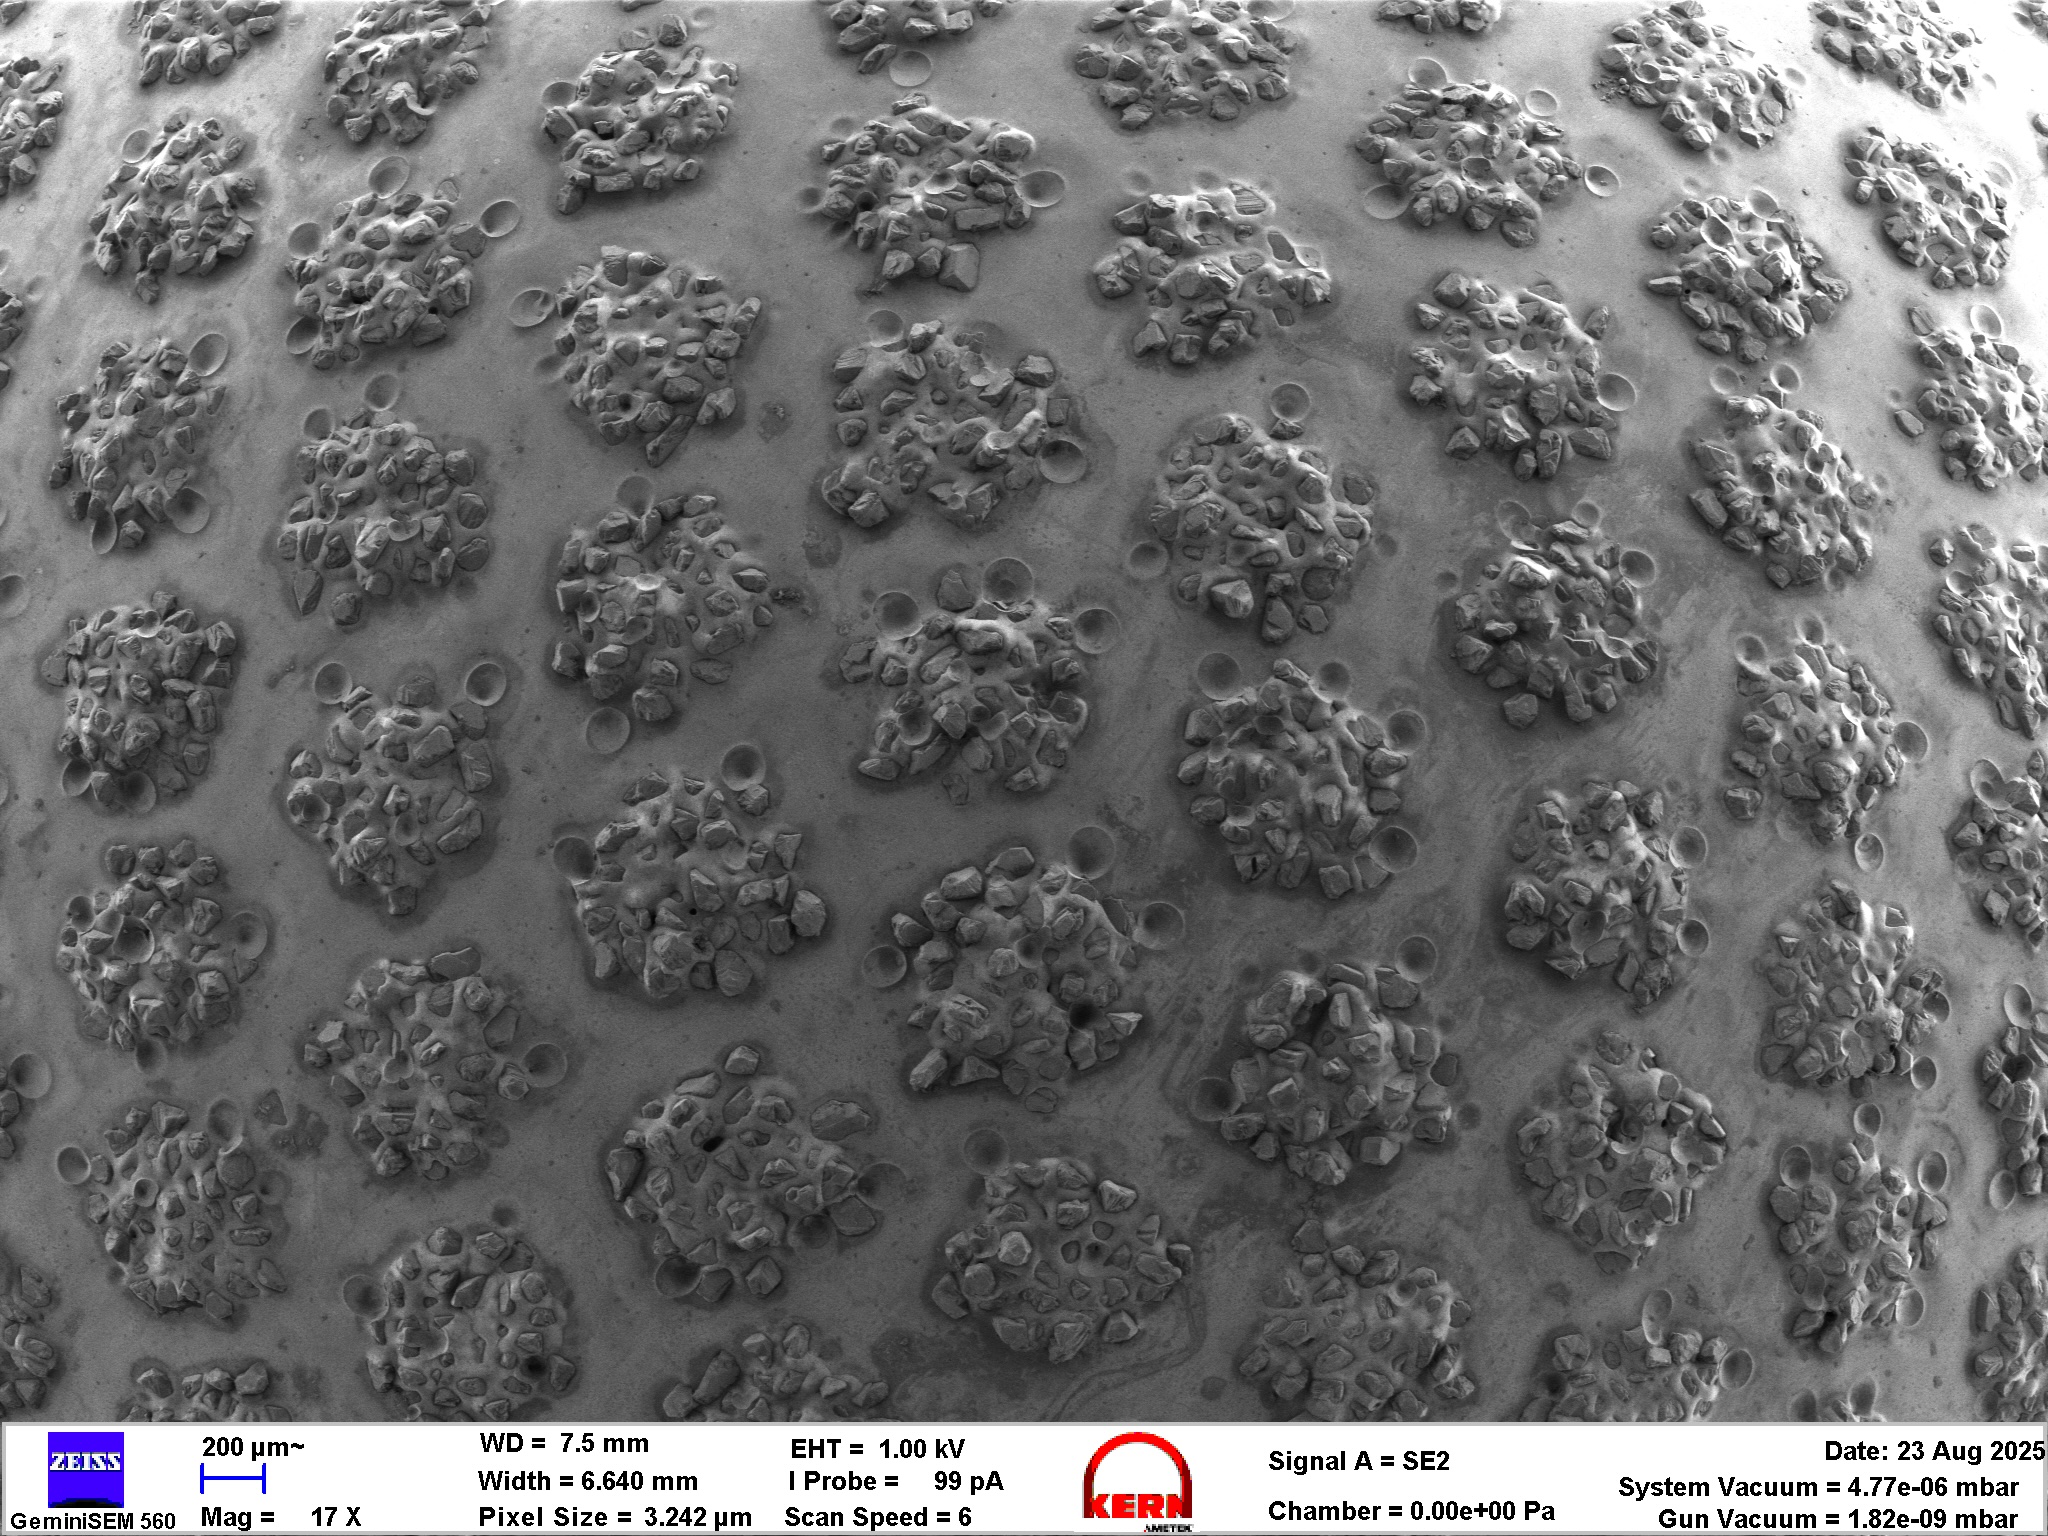
    Let’s take a closer look in the SEM:

    SEM micrographs of the Edge Pro Diamond Max 5 µm stone. Instrument: Zeiss GeminiSEM 560.

    We can see that this really is a high concentration stone! there’s diamond just about everywhere on the stone. No foreign particles jump out immediately. Unfortunately, just like with the 160 µm stone, some voids can be seen, and the remaining particles don’t show perfect, solid embedding either.

    Let’s look at the chemical composition! For this we are going to use an advanced SEM technique called EDS. If you want to know more about this, I’ve written extensively about SEM microanalysis here on this blog.

    EDS analysis of the Edge Pro Diamond Max 5 µm stone. Instrument: Oxford Ultim Max  ∞ 40mm2 EDS sensor. Note that our EDS sensor doesn’t show elements lighter than boron.

    The EDS definitely confirms the view – this is a LOADED stone. Lot’s of diamond. The distribution is good, but not perfect. Some foreign particles can be made out – those are ceramic particles from the manufacturers dressing.

    In order to evaluate the sharpening performance and material removal mode of this stone, a blade was sharpened with it. I am using a standardised testing procedure, read about it hereNevertheless, it’s 65 HRC M398, and sharpened to 17 DPS with resin bond diamond stones down to 10 µm. Afterwards, the tested stone is used, first in a back and forth movement until the surface becomes homogenous, and then alternating, edge trailing strokes (5-5-3-2) on each side, for a total of 20 strokes towards the apex per side. No pressure is applied but the weight of the apparatus. Moreover, the same approach is repeated with a blade in NitroV at 59-60 HRC.

    The edge is then analysed in the electron microscope for breakouts and morphological appearance.

    Let’s start with the harder steel – the M398 blade:

    SEM micrographs of the M398 edge finished with the Edge Pro Diamond Max 5 µm stone. Instrument: Zeiss GeminiSEM 560

    We get a good result here. The bevel is polished, shiny and the carbides are easily identified – typically a sure sign for higher polishing abilities! The apex is smooth, with very little damages visible. At higher magnifications (1kx, 5kx), once can see some scratches that very likely are from rolling, free grain. These are characterised by their appearance in the middle of the bevel – whereas embedded particles in the stone typically show up as scratches that go along the full length of the stone.

    A microscopic view of a cross-section of a material, showing distinct layers with fine textures. The scale bar at the bottom indicates 200 micrometres.

    Optical micrograph of the M398 bevel. Instrument: Marvscope

    Let us take a look at the surface height map:

    3D surface topography image illustrating a textured surface with varying heights, represented in colour from blue to red, alongside scale bars in micrometres and nanometres.

    3D surface height map of the M398 Bevel. Instrument: Zygo NewView 9000, Objective Lens: 20X. Metrological filter chain: LS-Plane to orient data, cutoff 0.1/99.9 percent to remove outliers.

    With the surface roughness parameters as follows:

    Sa0.00713µm
    Sq0.009512µm
    Ssk-0.8962
    Sku5.805

    ISO 25178 surface roughness parameters. S-Filter: 2.5 µm (gaussian), L Filter: 0.08 mm (gaussian). No F operation besides LSQ leveling.

    This is a very respectable result! A nanometric surface roughness, especially in the single digit range is a finely polished, mirror like surface.

    Let’s take a look at the NitroV edge:

    SEM micrographs of the NitroV edge. Instrument: Zeiss GeminiSEM 560

    The DiamondMax had a bit more issues on this steel – something that is often seen on soft diamond stones when used on softer, less high tech steels. Nevertheless, we get a fine apex, and a relatively smooth surface. Near the apex, more damage from rolling grain can be seen. The bevel on this test blade is a bit wider than on my M398, I’d guess that this allowed for more swarf to buildup.

    Microscopic image showing a finely textured surface with parallel grooves, marked with a scale bar indicating 200 micrometres.

    Optical micrograph of the NitroV bevel. Instrument: Marvscope

    Overall, this is a nicely working stone. Brand new, the stone felt very aggresive, but after the first “familiarising blade”, speed went down. On the tested blades, the stone was quick in the beginning, but got noticeably slower as swarf and loading build up.

    Comparison with the Diamond Matrix stone

    Now, let’s compare this to the proven and excellent Matrix 4000 – after all, this is the main question here: is it worth it to upgrade?

    Let’s take a look at identical condition microscopy pictures of the Diamond Matrix stone:

    SEM micrographs of the Edge Pro Diamond Matrix 5 µm stone. Instrument: Zeiss GeminiSEM 560.

    We can immediately make out a much lower diamond concentration.

    This is further confirmed in the EDS analysis:

    EDS analysis of the Edge Pro Diamond Max 5 µm stone. Instrument: Oxford Ultim Max  ∞ 40mm2 EDS sensor. Note that our EDS sensor doesn’t show elements lighter than boron.

    The view in the SEM is much more homogeneous than from the DiamondMax, with fewer “rolling grain” artifacts visible:

    Edge quality looks pretty much identical, but the surface morphology is more homogeneous.

    A black and white microscopic image showing the surface of a material with fine linear patterns and textures, taken at 10x magnification. A scale bar indicating 200 micrometres is included.

    This is further reflected in the 3D height map:

    3D surface profile of a material displayed in a colour gradient representing height variations, with marked axes for micrometre scale. The image features a colour bar indicating height in nanometres.

    The roughness is pretty much identical to the DiamondMax stone – I’d say there is no significant difference:

    Sa0.008447µm
    Sq0.01094µm
    Ssk-0.4306
    Sku4.170

    ISO 25178 surface roughness parameters. S-Filter: 2.5 µm (gaussian), L Filter: 0.25 mm (gaussian). No F operation besides LSQ leveling.

    Please check out my original review of the 4000 stone here:

    So, let us compare the results, side by side:

    Microscopic images comparing two samples, one displaying a textured surface with reddish-brown and green patterns, and the other showing a smoother, more uniform texture.

    Comparison between the new DiamondMax 5 µm (left side) and the “old” Diamond Matrix 5 µm (right side).

    The new DiamondMax stone definitely contains significantly more diamond. Moreover, it is build on the same “principles”, meaning it’s a very pure resin stone. According to the manufacturer, the resin hasn’t changed at all. The result is comparable in nature – the measured surface roughness is within the variance expected. The apex is comparable in quality. The DiamondMax feels ever so slightly faster, but I wouldn’t call it a significant difference. I feel like it looses more grains – this would go hand in hand with the manufacturers statement that it wears quicker, but also what we can identify as a slightly more irregular scratch pattern on a bevel due to rolling grains. Overall, I would say this is a minimal step forward in terms of speed, but it looses some of it’s quality by this. If I was you, I’d stick with the old Matrix 4000, this upgrade doesn’t look like it’s worth it.

    Just like in the last review, I want to draw the comparison with what a pure resin stone can do – and include results from my 5 µm sharpening stone here:

    SEM micrographs of a M398 edge finished with Dr. Marvs Scientific sharpening stone, 5 µm. Instrument: Zeiss GeminiSEM 560.

    It has a slightly cleaner, less wavy apex line. The surface in the SEM is comparable to the matrix stones. Optically, it’s much more homogeneous:

    Close-up view of a polished material surface, showing fine scratches and texture, with a scale bar indicating measurements in micrometres.

    Optical micrograph of the M398 blade finished with Dr. Marv’s 5 µm stone. Instrument: Marvscope

    In the 3D height map, we can identify fewer scratches and an overall smoother surface:

    3D surface topography image showing a textured surface with varying heights, represented in a colour gradient from blue to red, indicating measurements in nanometres, with axes labelled in micrometres.

    The surface roughness parameters are lower:

    Sa0.006707µm
    Sq0.008277µm
    Ssk0.2270
    Sku2.808

    ISO 25178 surface roughness parameters. S-Filter: 2.5 µm (gaussian), L Filter: 0.25 mm (gaussian). No F operation besides LSQ leveling.

    So, with a cheeky smile from my side: if you are looking to upgrade your Diamond Matrix 4000, I wouldn’t. It’s a fantastic stone. The new DiamondMax doesn’t differ significantly but in price. My 5 µm stone gives a cleaner result, but instead of buying my stone, I have a different suggestion for you:

    Spend that “upgrade money” on a nice dinner with a person who is important to you. It is better invested.

  • A brief study on sharpening stones – Part 62 – Edge Pro Diamond Max 160 µm (Diamond, Resin)

    This is part of a series of blog posts – looking into the appearance and composition of commercially available sharpening stones. If you are interested in the previous episodes, check out the archive for them.

    If you have some suggestion on what I should look at next, or want to share your super secret DIY stones, I could be persuaded to open the bag of analytical devices… hit me up on Instagram under @marvgro for that.

    Disclaimer: I’m not for sale. Every review you see on this blog is bought with my own money. I have no affiliation to any manufacturer.

    Review

    Today’s sharpening stone is the brand new, just released EdgePro Diamond Max! Rumors of these stones coming have been floating around for a couple of months already, and I have been very much itching to get my hands on one of these. The Edge Pro Matrix stones (also sold by the producer, CGSW) are considered some of the best sharpening stones on the market – rightfully so! I had their 5 µm Matrix stone on the blog quite some while ago. It gives a fantastic edge, polishes the bevel finely and I only had two major issues with it: it is probably the most expensive sharpening stone on the market by amount of abrasive you are buying, and the low concentration made that stone very slow.

    When they got launched in a silent reveal at the end of April, I didn’t hesitate a single second, eager to try it out and order 3 stones to Germany. Something I want to highlight here: the contact with the owner of EdgePro, Cody, was superb – I had a question about tracking and got a super polite, helpful email back. This, dear readers is why I advocate buying from small manufacturers, and ideally directly from them!

    Just two days ago, Cody uploaded a video on his youtube channel explaining about these stones. The new DiamondMax stones seem to adress the issue of speed, albeit this comes hand in hand with a major price bump (roughly 20$ increase on the stones, bringing this 160 µm / 80 grit stone to 107$ before taxes / import duties if you buy outside the US). The abrasive layer is still very thin. According to the manufacturer, these stones now contain between 1.8 and 2.5x more diamond, depending on their grit!

    Let’s take a look under the optical microscope!

    Optical micrographs of the stone. Instrument: Marvscope

    I absolutely love coarse sharpening stones under an optical microscope! There, one really can make out the grain and grain concentration. The stone has a high concentration of quite blocky diamonds, a natural appearance at that grit size. The grains tend to clump together in groups of 3-6 grains. In between the grains, we can see the white resin layer. Some much smaller, blue-blackish particles can be made out.

    I do not own a comparable size Diamond Matrix stone (hold your curiosity until I get around to the 5 µm review, there I can do a direct comparison!). The producer of the stones seems to still be CGSW, and he is very curious about my sharpening stones. In this thread on the bladeforums, David writes:

    “…Diamond Max series that didn’t go anywhere. I made 2 sets of Matrix stones with the most diamond in them that I could a few years ago. One for EP and one for me. They do cut a little faster but at the expense of wearing much faster. Even if they didn’t cost more they would be a lower value than the current Matrix stones so they didn’t make it to production.” Quote from user “Diemaker” on the bladeforums, accessed on Sunday, 24th of May 2026.

    Uff. Okay. That’s a hardcore statement to make about a product that is yet to launch.

    Let’s take a closer look in the SEM:

    SEM micrographs of the EdgePro DiamondMax 160 µm stone. Instrument: Zeiss GeminiSEM 560.

    Under the SEM, the blocky nature of the grains is further confirmed. Size seems to peak at 160µm, with the majority of grains slightly smaller (100-140 µm). It is normal that diamond powder is not a single size, a gaussian distribution is always expected. What I find very curious is the high amount of “voids”, where clear imprints of grains have sat before. This is the stone before use, and already a massive loss of grains can be made out. Zooming in on one grain, we can see that although the resin is confining the grain above it’s main diameter, it is already loose and there is some gap between the resin and the grain.

    Grain adhesion is the major issue in most resin stones, and it becomes more dominant the larger the grain becomes.

    Let’s look at the chemical composition! For this we are going to use an advanced SEM technique called EDS. If you want to know more about this, I’ve written extensively about SEM microanalysis here on this blog.

    EDS analysis of the EdgePro DiamondMax 160 µm stone. Instrument: Oxford Ultim Max  ∞ 40mm2 EDS sensor. Note that our EDS sensor doesn’t show elements lighter than boron.

    The stone shows the typical, very pure composition we already saw in the Matrix stones: There’s diamond in there, and an organic binder, with not much else. The black-blue grain we made out in the optical micrograph shows as an oxide-abrasive grain, mostly peaking on the Mg-Si-O channel. I would guess that this is some abrasive debris from their flattening process. It will probably disappear after a few sharpening cycles, leaving a pure stone behind.

    The impression that the diamond grain seems to clump together a bit is further confirmed in this image – we can see small nests of diamond.

    In order to evaluate the sharpening performance and material removal mode of this stone, a blade was sharpened with it. I am using a standardised testing procedure, read about it hereNevertheless, it’s 65 HRC M398, and sharpened to 17 DPS with resin bond diamond stones down to 10 µm. Afterwards, the tested stone is used, first in a back and forth movement until the surface becomes homogenous, and then alternating, edge trailing strokes (5-5-3-2) on each side, for a total of 20 strokes towards the apex per side. No pressure is applied but the weight of the apparatus. Moreover, the same approach is repeated with a blade in NitroV at 59-60 HRC.

    The edge is then analysed in the electron microscope for breakouts and morphological appearance.

    Something that became immediately apparent when using the DiamondMax stone, and was already suspected from the SEM pictures: this stone looses a lot of grains! Let me show you what I mean:

    Microscopic views of the loose grain /swarfs after 20 and 100 strokes with the stone. Instrument: 100x Macro Loupe on iphone 17 Pro Max

    Already on the first stroke (edge trailing), one could feel how grains would jump out. I counted to 20 strokes, and then did a picture of the bevel with my phone. You can see a frankly absurd amount of diamond – and very little swarf. Over the next 80 strokes, the stone picked up some speed, producing a lot of swarf, but also loosening even more grains. I cleaned it off, applied new lubricant and the same thing happened. Initial, hard grain loss, followed by an increase in material removal rate once there’s a certain “slush” going on. I’m a bit stumped by this wear rate – and frankly, if you sharpen any expensive knife, you do not want this massive amount of loose grains potentially scratching the surface.

    Let’s take a closer look at the result, and start with the harder steel – the M398 blade:

    SEM micrographs of the M398 edge finished with the EdgePro DiamondMax 160 µm stone. Instrument: Zeiss GeminiSEM 560

    We can see quite the ragged edge. The bevel shows clear signs of the rolling grain – deep scratches in the middle of the bevel, stopping and starting randomly.

    The overall appearance is diffuse and sligthly chaotic – this is because the rolling, loose grain can jump around, but also move sideways and not only in the direction of the sharpening stroke.

    Microscopic view of a metal surface showing fine linear textures and structures, with a scale bar indicating 200 micrometres.

    Optical micrograph of the M398 bevel. Instrument: Marvscope

    Which is further visible in the white light interferometer measurements of the bevel: a diffuse, marred surface:

    3D surface topography image showing textured patterns in various colours representing height variations, with a scale bar indicating measurements in micrometres.

    3D surface height map of the M398 Bevel. Instrument: Zygo NewView 9000, Objective Lens: 20X. Metrological filter chain: LS-Plane to orient data, cutoff 0.1/99.9 percent to remove outliers.

    The surface roughness is pretty rough, too:

    Sa0.3708µm
    Sq0.5017µm
    Ssk-0.7942
    Sku5.777

    ISO 25178 surface roughness parameters. S-Filter: 2.5 µm (gaussian), L Filter: 0.08 mm (gaussian). No F operation besides LSQ leveling.

    Overall, I’m quite disappointed. Let’s see whether the stone performs nicer in a softer, easier steel, and take a look at the NitroV edge:

    SEM micrographs of the NitroV edge. Instrument: Zeiss GeminiSEM 560

    In addition to the very rough, broken up surface, we can also detect some splintered pieces of diamond that have embedded themselves into the bevel.

    Microscopic view of a textured surface, featuring fine linear patterns and striations, with scale bar indicating 200 micrometres.

    Optical micrograph of the NitroV bevel. Instrument: Marvscope

    The surface looks a bit more irregular, with a massive amount of sideways or circular scratchmarks, caused by the grain rolling around freely in the abrasive/debris slush created.

    3D surface topography image showing textured patterns in a colour gradient, with height represented from 0 to 6.65 micrometres. Includes a legend indicating height measurements and a series of smaller images illustrating different views.

    3D surface height map of the NitroV Bevel. Instrument: Zygo NewView 9000, Objective Lens: 20X. Metrological filter chain: LS-Plane to orient data, cutoff 0.1/99.9 percent to remove outliers.

    The surface roughness deteriorates even more:

    Sa0.4595µm
    Sq0.6215µm
    Ssk-0.8645
    Sku5.439

    ISO 25178 surface roughness parameters. S-Filter: 2.5 µm (gaussian), L Filter: 0.08 mm (gaussian). No F operation besides LSQ leveling.

    Now, you might think at this point: why am I so disappointed? It’s a coarse stone, meant for quick material removal, and some grain shedding is expected, especially on resin stones.

    The problem is: it’s not. It can be done differently, it can be done better.

    Let me explain, and I’ll do so by something I do very rarely – a direct comparison. You see, I also make a resin stone with near identical grain size denomination, the Dr. Marv Scientific Sharpening stone in 150 µm. Let me pull you up an optical picture, side by side to the EdgePro Diamond Max in 160 µm:

    Identical magnification shots of (first picture) the Diamond Max 160 µm and (second picture) the Dr. Marv 150 µm stones.

    I will let you draw conclusions about the concentration yourself. Let us compare the results – this is the exact same M398 blade, sharpened with my stone:

    SEM micrographs of the M398 edge finished with Dr. Marv’s 150 µm resin stone. Instrument: Zeiss GeminiSEM 560

    The view of debris after 20 and 100 strokes:

    View of the swarf after 20 and 100 strokes, sharpened with Dr. Marv 150 µm resin stone.

    Optical micrograph of the bevel:

    Close-up microscopic image showing a metallic surface with fine linear scratches, demonstrating texture and detail, labelled with measurement scale.

    Optical micrograph of the M398 bevel. Instrument: Marvscope

    And last but not least, the WLI results:

    3D surface plot showing a textured surface with varying elevations in micrometres, colour-coded from blue to red, accompanied by a colour scale on the right indicating elevation levels.

    3D surface height map of the M398 Bevel. Instrument: Zygo NewView 9000, Objective Lens: 20X. Metrological filter chain: LS-Plane to orient data, cutoff 0.1/99.9 percent to remove outliers.

    With the surface roughness values being about 2.5x lower than on the EdgePro stone:

    Sa0.1481µm
    Sq0.1981µm
    Ssk-1.003
    Sku4.930

    ISO 25178 surface roughness parameters. S-Filter: 2.5 µm (gaussian), L Filter: 0.08 mm (gaussian). No F operation besides LSQ leveling.

    I typically end my reviews with a conclusion. I think none is needed here, but for completeness sake I’ll do one:

    The DiamondMax 80 grit stone seems to have a high diamond concentration. It is definitively not the maximum possible. Some agglomeration is apparent in micrographs and chemical analysis. Grain retention is nearly non existent on the stone, with large amounts of wear and free-rolling grain induced results on the blade. The stone is probably the most expensive diamond stone on the market if one takes the very thin arbasive layer into account. Results are matching these findings – marred, rough bevels and a ragged, wavy apex. The initial quote I pulled from David (CGSW) on the Bladeforums becomes very true:

    Even if they didn’t cost more they would be a lower value than the current Matrix stones

    And they even bumped the price.

  • A brief study on sharpening stones – Part 61 – FSK Vitrified #1000 (Diamond, Vitrified)

    This is part of a series of blog posts – looking into the appearance and composition of commercially available sharpening stones. If you are interested in the previous episodes, check out the archive for them.

    If you have some suggestion on what I should look at next, or want to share your super secret DIY stones, I could be persuaded to open the bag of analytical devices… hit me up on Instagram under @marvgro for that.

    Disclaimer: I’m not for sale. Every review you see on this blog is bought with my own money. I have no affiliation to any manufacturer.

    Review

    Today’s sharpening stone is once again something very special – it’s the wonderfully finished, presented and made FSK Vitrified #1000 Diamond stone. In a previous part, we’ve had the #270 grit of this series, and just like in that review, the finish, packaging and presenting of the stone is fantastic. Be sure to check the #270 out here:

    Just like the #270 grit, this is really expensive premium stone – with taxes and import duties, it was just above 600 Euro, delivered to my doorstep in Germany.

    Let’s take a look under the optical microscope!

    Optical micrographs of the FSK vitrified #1000 diamond stone. Instrument: Marvscope

    The stone is a lighter colour than it’s #270 grit brother. Less of a green appearance, which is usually typical of finer diamond grits. The stone is nearly transparent, with a high degree of vitrification in the bond.

    Let’s take a closer look in the SEM:

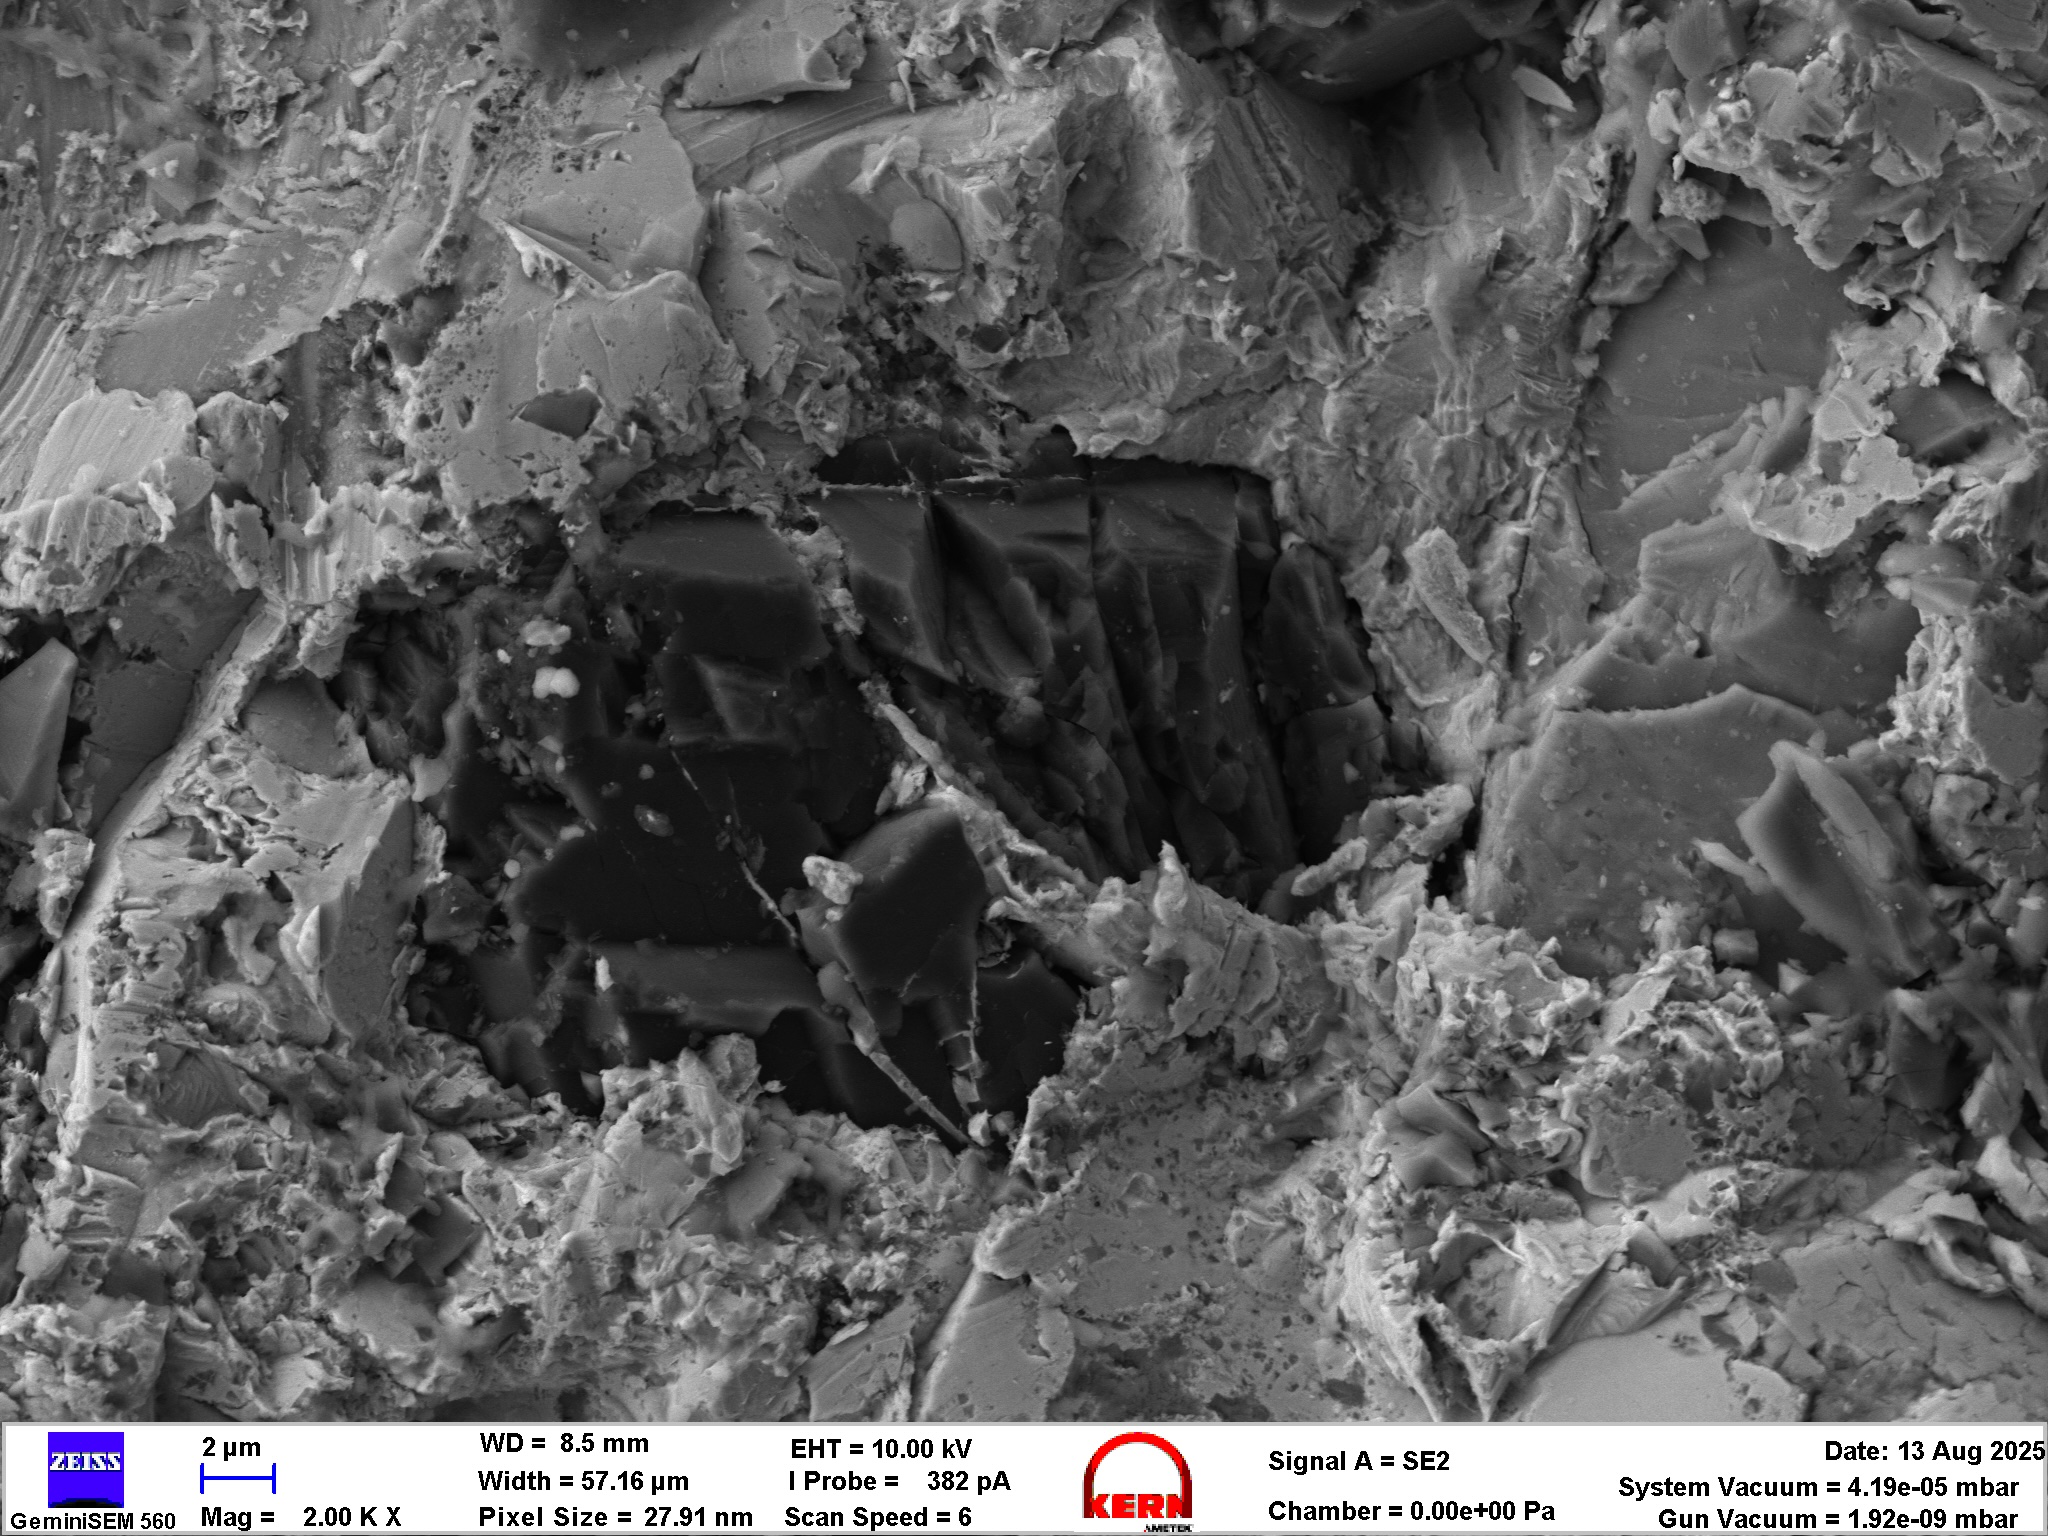
    SEM micrographs of the FSK vitrified #1000 diamond stone. Instrument: Zeiss GeminiSEM 560.

    The surface is very regular, and once again shows small bubble like voids. The diamond grit is distributed all over, with a blocky, high quality diamond predominant. FSK seems to use very high quality raw material to make this stone! The diamonds are firmly embedded in the bond, and the actual vitrified matrix looks extremely dense and compact.

    Let’s look at the chemical composition! For this we are going to use an advanced SEM technique called EDS. If you want to know more about this, I’ve written extensively about SEM microanalysis here on this blog.

    EDS analysis of the FSK Vitrified #1000 diamond stone. Instrument: Oxford Ultim Max  ∞ 40mm2 EDS sensor. Note that our EDS sensor doesn’t show elements lighter than boron.

    EDS analysis shows a super regular distribution of the diamond. Concentration should be a bit higher if you ask me, but the mixing seems to be absolutely top notch. It feels like I’ve seldom had such good distribution on a diamond stone.

    In order to evaluate the sharpening performance and material removal mode of this stone, a blade was sharpened with it. I am using a standardised testing procedure, read about it hereNevertheless, it’s 65 HRC M398, and sharpened to 17 DPS with resin bond diamond stones down to 10 µm. Afterwards, the tested stone is used, first in a back and forth movement until the surface becomes homogenous, and then alternating, edge trailing strokes (5-5-3-2) on each side, for a total of 20 strokes towards the apex per side. No pressure is applied but the weight of the apparatus. Moreover, the same approach is repeated with a blade in NitroV at 59-60 HRC.

    The edge is then analysed in the electron microscope for breakouts and morphological appearance.

    Let’s start with the harder steel – the M398 blade:

    SEM micrographs of the M398 edge finished with the FSK vitrified #1000 diamond stone. Instrument: Zeiss GeminiSEM 560

    The bevel has a slightly toothed edge, with a clearly folded over (facing away from the viewing direction) burr. The bevel surface morphology is super regular – there’s close to no deep scratches.

    This is further visible in the optical micrograph: A toothy edge, that is super homogeneous albeit matte in it’s appearance.

    A close-up, high-resolution image of a material surface, showcasing a textured pattern with fine lines and variations. The scale bar indicates measurements in micrometres.

    Optical micrograph of the M398 bevel. Instrument: Marvscope

    The WLI measurements show this exact situation. The blade is diffuse, not super smooth, but very regular. A large, multi micron burr exists on the apex.

    3D topographic representation of a surface, showing textured features with varying heights, measured in micrometers.

    3D surface height map of the M398 Bevel. Instrument: Zygo NewView 9000, Objective Lens: 20X. Metrological filter chain: LS-Plane to orient data, cutoff 0.1/99.9 percent to remove outliers.

    The surface roughness parameters reflect this. It is an acceptable surface roughness for a #1000 stone.

    Sa0.2741µm
    Sq0.4098µm
    Ssk-0.4744
    Sku11.90

    ISO 25178 surface roughness parameters. S-Filter: 2.5 µm (gaussian), L Filter: 0.25 mm (gaussian). No F operation besides LSQ leveling.

    Let’s take a look at the NitroV edge:

    SEM micrographs of the NitroV edge. Instrument: Zeiss GeminiSEM 560

    The NitroV bevel, shows a larger burr, but also an even more homogeneous surface. I actually love the matte, diffuse finish created here. There are quite a few much deeper scratches, but again they are so well distributed that they don’t really mar the surface.
    The large >10 µm burr is visible in the optical micrograph as well:

    Micrograph showing a high-resolution image of a textured surface with vertical lines, including a scale bar indicating 200 micrometres.

    Optical micrograph of the NitroV bevel. Instrument: Marvscope

    And facing upwards in the WLI interferometric picture, we can really see that it is nicely bend over. This is an easily detectable burr, which definitely needs to be removed before a sharp apex is achieved.

    3D surface plot of a textured material showing varying heights represented in a blue and green colour gradient, with measurements in micrometres along the axes.

    3D surface height map of the NitroV Bevel. Instrument: Zygo NewView 9000, Objective Lens: 20X. Metrological filter chain: LS-Plane to orient data, cutoff 0.1/99.9 percent to remove outliers.

    The deeper scratches are reflected in the quantitative surface roughness parameters:

    Sa0.6563µm
    Sq1.069µm
    Ssk0.4803
    Sku14.61

    ISO 25178 surface roughness parameters. S-Filter: 2.5 µm (gaussian), L Filter: 0.25 mm (gaussian). No F operation besides LSQ leveling.

    The stone itself is blissful to use. It’s got fantastic feedback, is very hard, doesn’t seem to wear at all, requires next to no soaking, just regular reapplication of water. I know this stone was hyped as a wonderful freehand benchstone on the internet, and I can definitely understand it. It is well made, the results are decent, the finish is immaculate if one wants a matte, diffuse surface. I only feel that the burr created is too large for this grain size. The major downside is the limited availability and high price. It kind of feels like one can get a similar result from a sharpening stone 5x cheaper, albeit without the wonderful design, packaging and vitrified feel.

    I like this stone and just like the Shapton glass, it will become a regularly used sharpening stone when I partake in sharpening as a hobby!