This is part of a series of blog posts – looking into the appearance and composition of commercially available sharpening stones. If you are interested in the previous episodes, check out the archive for them.
If you have some suggestion on what I should look at next, or want to share your super secret DIY stones, I could be persuaded to open the bag of analytical devices… hit me up on Instagram under @marvgro for that.
Disclaimer: I’m not for sale. Every review you see on this blog is bought with my own money. I have no affiliation to any manufacturer.
Review
Today’s sharpening stone is another KDTU stone. We’ve had their hybrid CBN on the blog before, albeit in a much coarser grit. This time, it’s the Hybrid Diamond version, in the relatively fine 14/10 µm declaration. Let’s take a closer look:


Optical micrographs of the stone. Instrument: Leica Emspira
Immediately visible is – the stone is “spotted” all over. Quite a few smaller agglomerates, but also larger sections were the stone is not homogeneous. At the time of this review, the manufacturer writes on their homepage:
“Hybrid bond whetstones may have some multi-colored streaks on the surface of the working layer, like on natural stones. They may differ in shades. This depends on the size of the abrasive grain in the whetstone or be lighter or darker even on the same grains. The quality of sharpening whetstones does not depend on the shades and color of the working surface.” – KDTU Homepage on bond colour, accessed on Sunday, 1st of February 2026
I’m a bit skeptical. In my experience, bad mixing leads to sections that are inhomogeneous, and those agglomerations act like particles that are much larger, giving deeper and wider scratches. Fortunately, we can check whether it’s just colour or actually something else. Into the SEM!


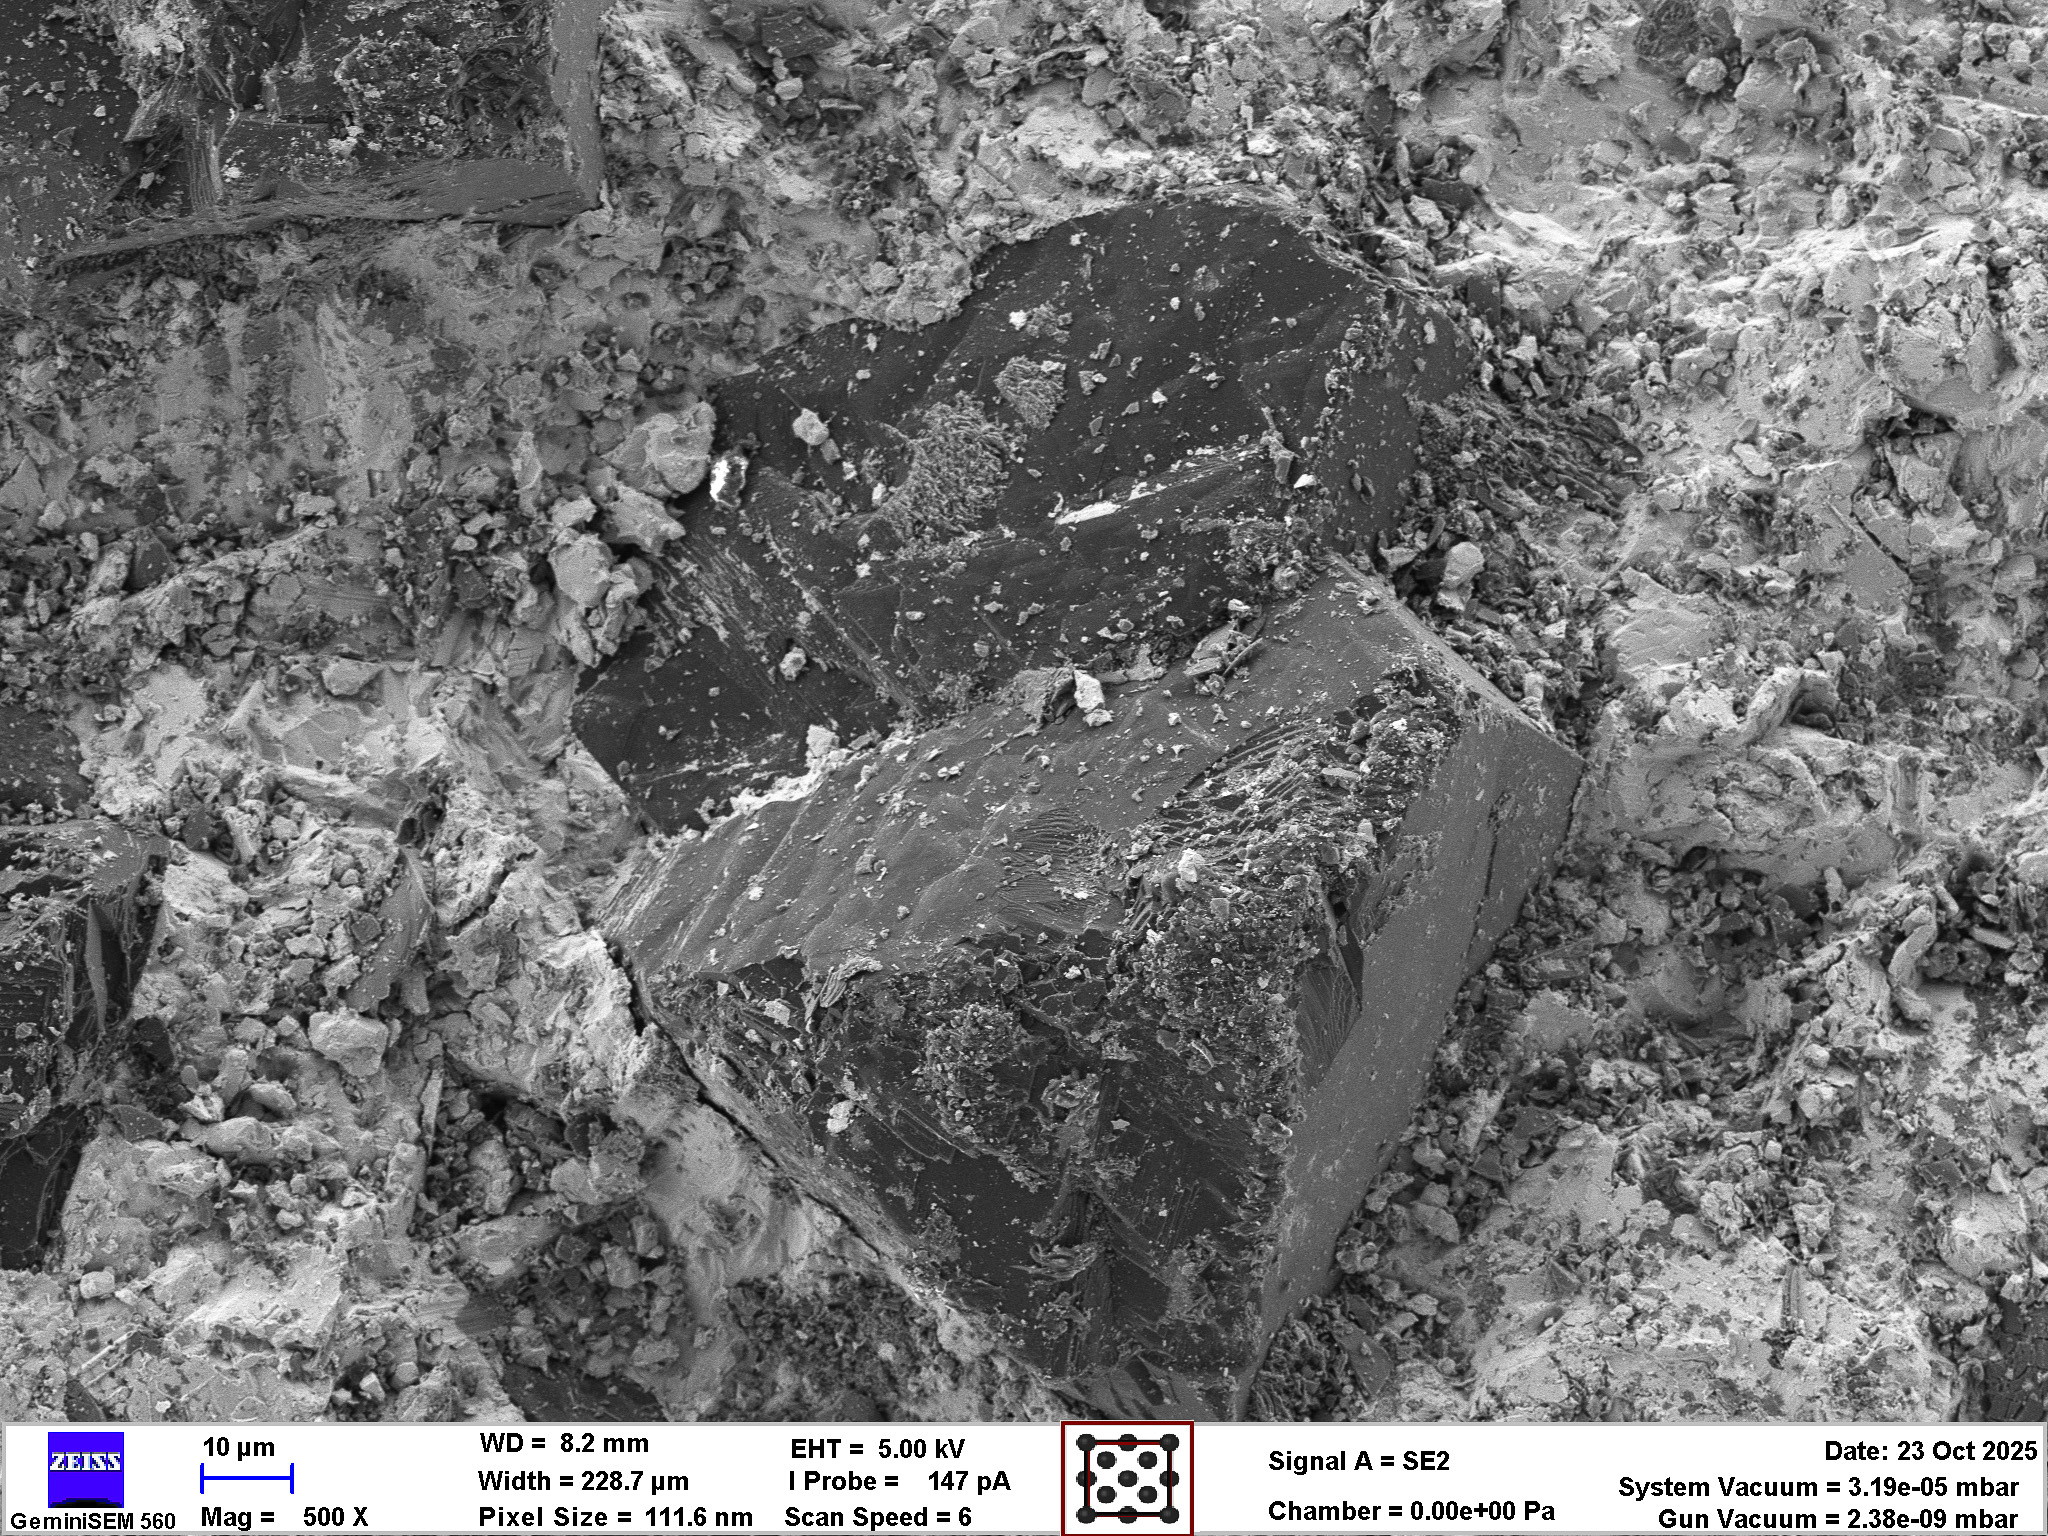
SEM micrographs of the stone. Instrument: Zeiss GeminiSEM 560.
In the SEM, we can see a standard mixed resin bond, but also large pockets, that seem to consist only of hard, similar sized grains. These pockets likely were “full” once, but lost the majority of their filling during dressing or cleaning of the stones. Inside the bubble shaped recession, one can make out many similar sized grains. I’m curious what these particles consist out of.
Let’s look at the chemical composition! For this we are going to use an advanced SEM technique called EDS. If you want to know more about this, I’ve written extensively about SEM microanalysis here on this blog.


EDS analysis of the stone. Instrument: Oxford Ultim Max ∞ 40mm2 EDS sensor. Note that our EDS sensor doesn’t show elements lighter than boron.
The EDS detector shows that the bubble particles are mostly silicon – some oxygen is visible as well. I would guess that it is hard particles of SiO2? Maybe some smaller SiC grains? The analysis is not fully concise here, it’s difficult to get the xray signal out of a pocket. A second location shows a lot of SiO2 particles, with a decent diamond concentration that tends to clump together. Overall, this stone is pretty badly mixed. Let’s check whether this impacts the final result!
In order to evaluate the sharpening performance and material removal mode of this stone, a blade was sharpened with it. I am using a standardised testing procedure, read about it here. Nevertheless, it’s 65 HRC M398, and sharpened to 17 DPS with resin bond diamond stones down to 10 µm. Afterwards, the tested stone is used, first in a back and forth movement until the surface becomes homogenous, and then alternating strokes (5-5-3-2) on each side, for a total of 20 strokes towards the apex per side. No pressure is applied but the weight of the apparatus.
The edge is then analysed in the electron microscope for breakouts and morphological appearance.


SEM micrographs of the edge finished with the KDTU stone. Instrument: Thermo Fischer PhenomXL SEM.
I’m not super happy, but also not super disappointed with this edge. The apex itself is okay-ish formed, it shows some deeper grooves than I would expect at 14/10 µm, which likely stems from the larger particles. The surface of the bevel meanwhile looks really rough. Lot’s of small prows, burrs and smearing is visible. This typically shows on M398 when the stone abrasive is too soft – for example, natural stones and SiC / Al2O3 based stones show this effect a lot.
In the optical microscope, this is confirmed: the surface is marred and slightly dull.


Microscope pictures of the KDTU 14/10 diamond hybrid stone. Instrument: Leica EMSPIRA
The stone itself is pleasant to use, with quite a bit of feedback. The edge got decently sharp, but nothing groundbreaking here. In my opinion, this is a mid-level stone that suffers mostly from the bad mixing, inhomogenous makeup and massive amounts of filler abrasives.