TL;DR: The Atoma F1200 is an electroplated (EP) diamond sharpening stone with a fine grit. It features a regular, patterned distribution of grains, in a strong nickel-chromium binder. It’s dominated by it’s quick loading, which then diminishes performance. As with most fine EP stones, your money is better spend on a high quality resin stone!
This is part of a series of blog posts – looking into the appearance and composition of commercially available sharpening stones. If you are interested in the previous episodes, check out the archive for them.
If you have some suggestion on what I should look at next, or want to share your super secret DIY stones, I could be persuaded to open the bag of analytical devices… hit me up on Instagram under @marvgro for that.
Disclaimer: I’m not for sale. Every review you see on this blog is bought with my own money. I have no affiliation to any manufacturer.
Review
Today’s sharpening stone was send to me by a very generous friend – thanks Lynn! We are looking at the 1×6″ version of the ATOMA stones, which is sold by Jende. According to the manufacturer, these “Diamond plates are premium quality diamond plates, and excel in faster cutting, prolonged durability, and delivering a consistently uniform finish across each grit level.”
A previous blog post looked at the F140, and another post at the F400. This review looks at the finest of the Jende stones, the F1200.


Optical micrographs of the stone. Instrument: Leica Emspira
This stone is much finer in it’s pattern than the two previous stones. It seems like Atoma is not only decreasing the diamond grit size, but also the mesh of the mask they use to structure the stone. This one is actually already very homogenous to the naked eye – a pattern is easy to overlook in bad light. Let’s take a closer look under the SEM:


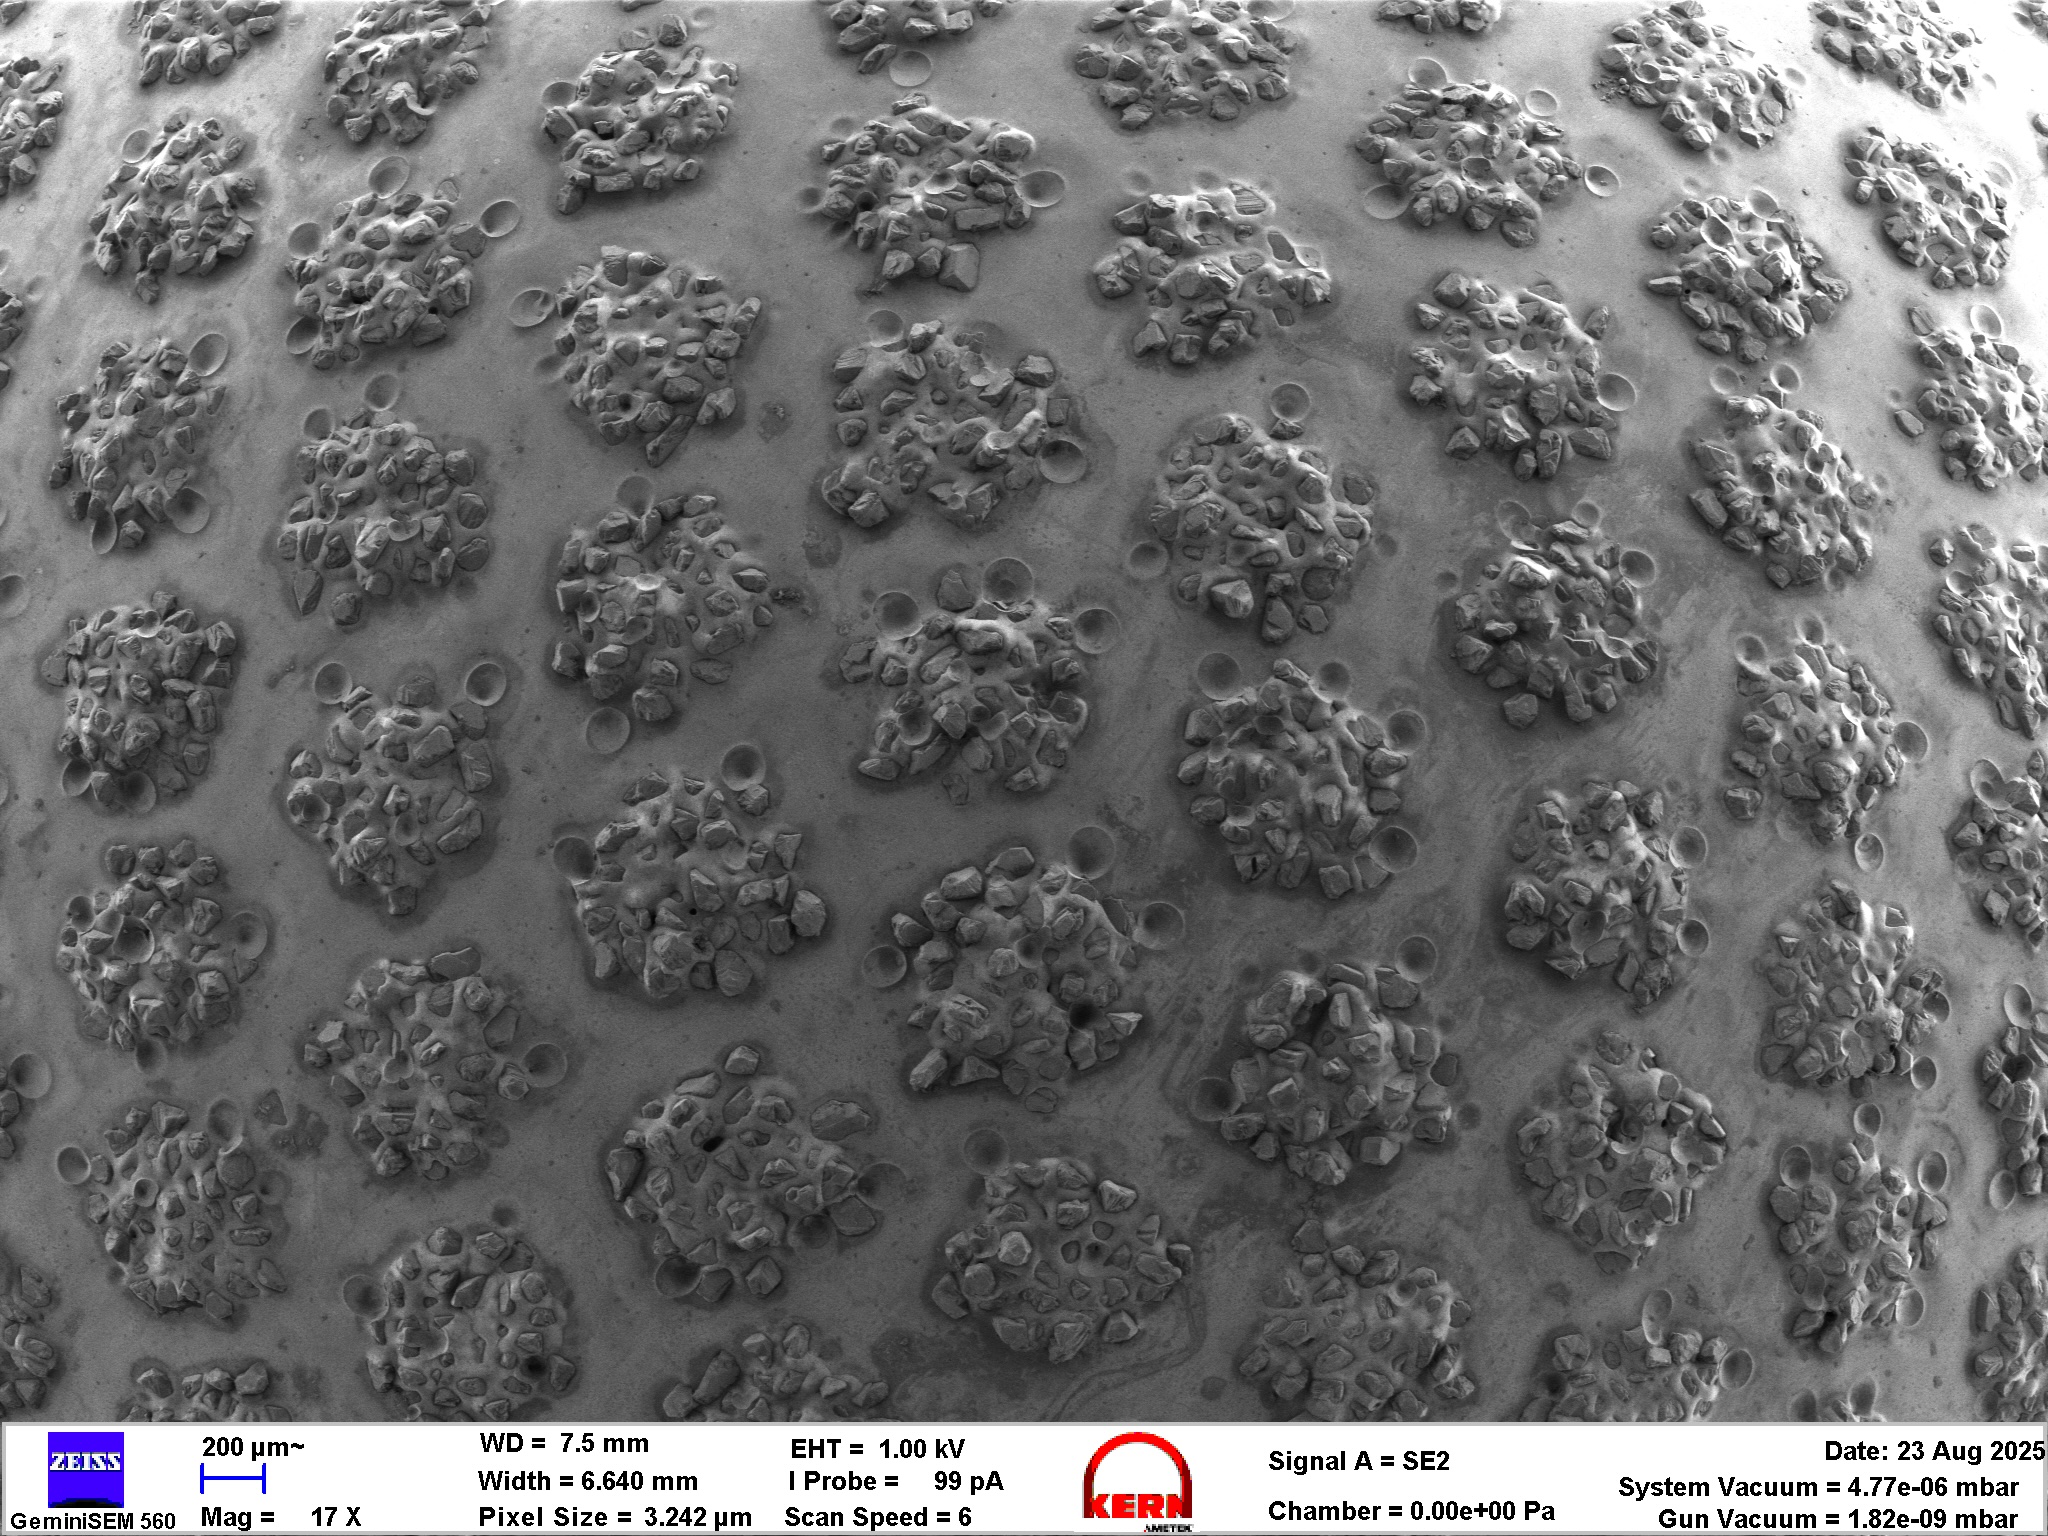
SEM micrographs of the ATOMA F1200 stone. Instrument: Zeiss GeminiSEM 560.
The finer stone has (obviously) much smaller diamonds on it. Remarkably enough, in these “piles” of diamonds, there seems to be something which looks like a very dusty, dry binder. I’m not 100% sure this is what the manufacturer was aiming for. But very fine, sub 10 micron EP stones are devilish tricky to make with galvanic binder alone. Maybe some mix has happened here? A couple of larger (3-5x) particles can be found.
For the EDS analysis, refer to the Atoma F140 stone review. It is identical!
In order to evaluate the sharpening performance and material removal mode of this stone, a blade was sharpened with it. I am using a standardised testing procedure, read about it here. Nevertheless, it’s 65 HRC M398, and sharpened to 17 DPS with resin bond diamond stones down to 10 µm. Afterwards, the tested stone is used, first in a back and forth movement until the surface becomes homogenous, and then alternating strokes (5-5-3-2) on each side, for a total of 20 strokes towards the apex per side. No pressure is applied but the weight of the apparatus.
The edge is then analysed in the electron microscope for breakouts and morphological appearance.


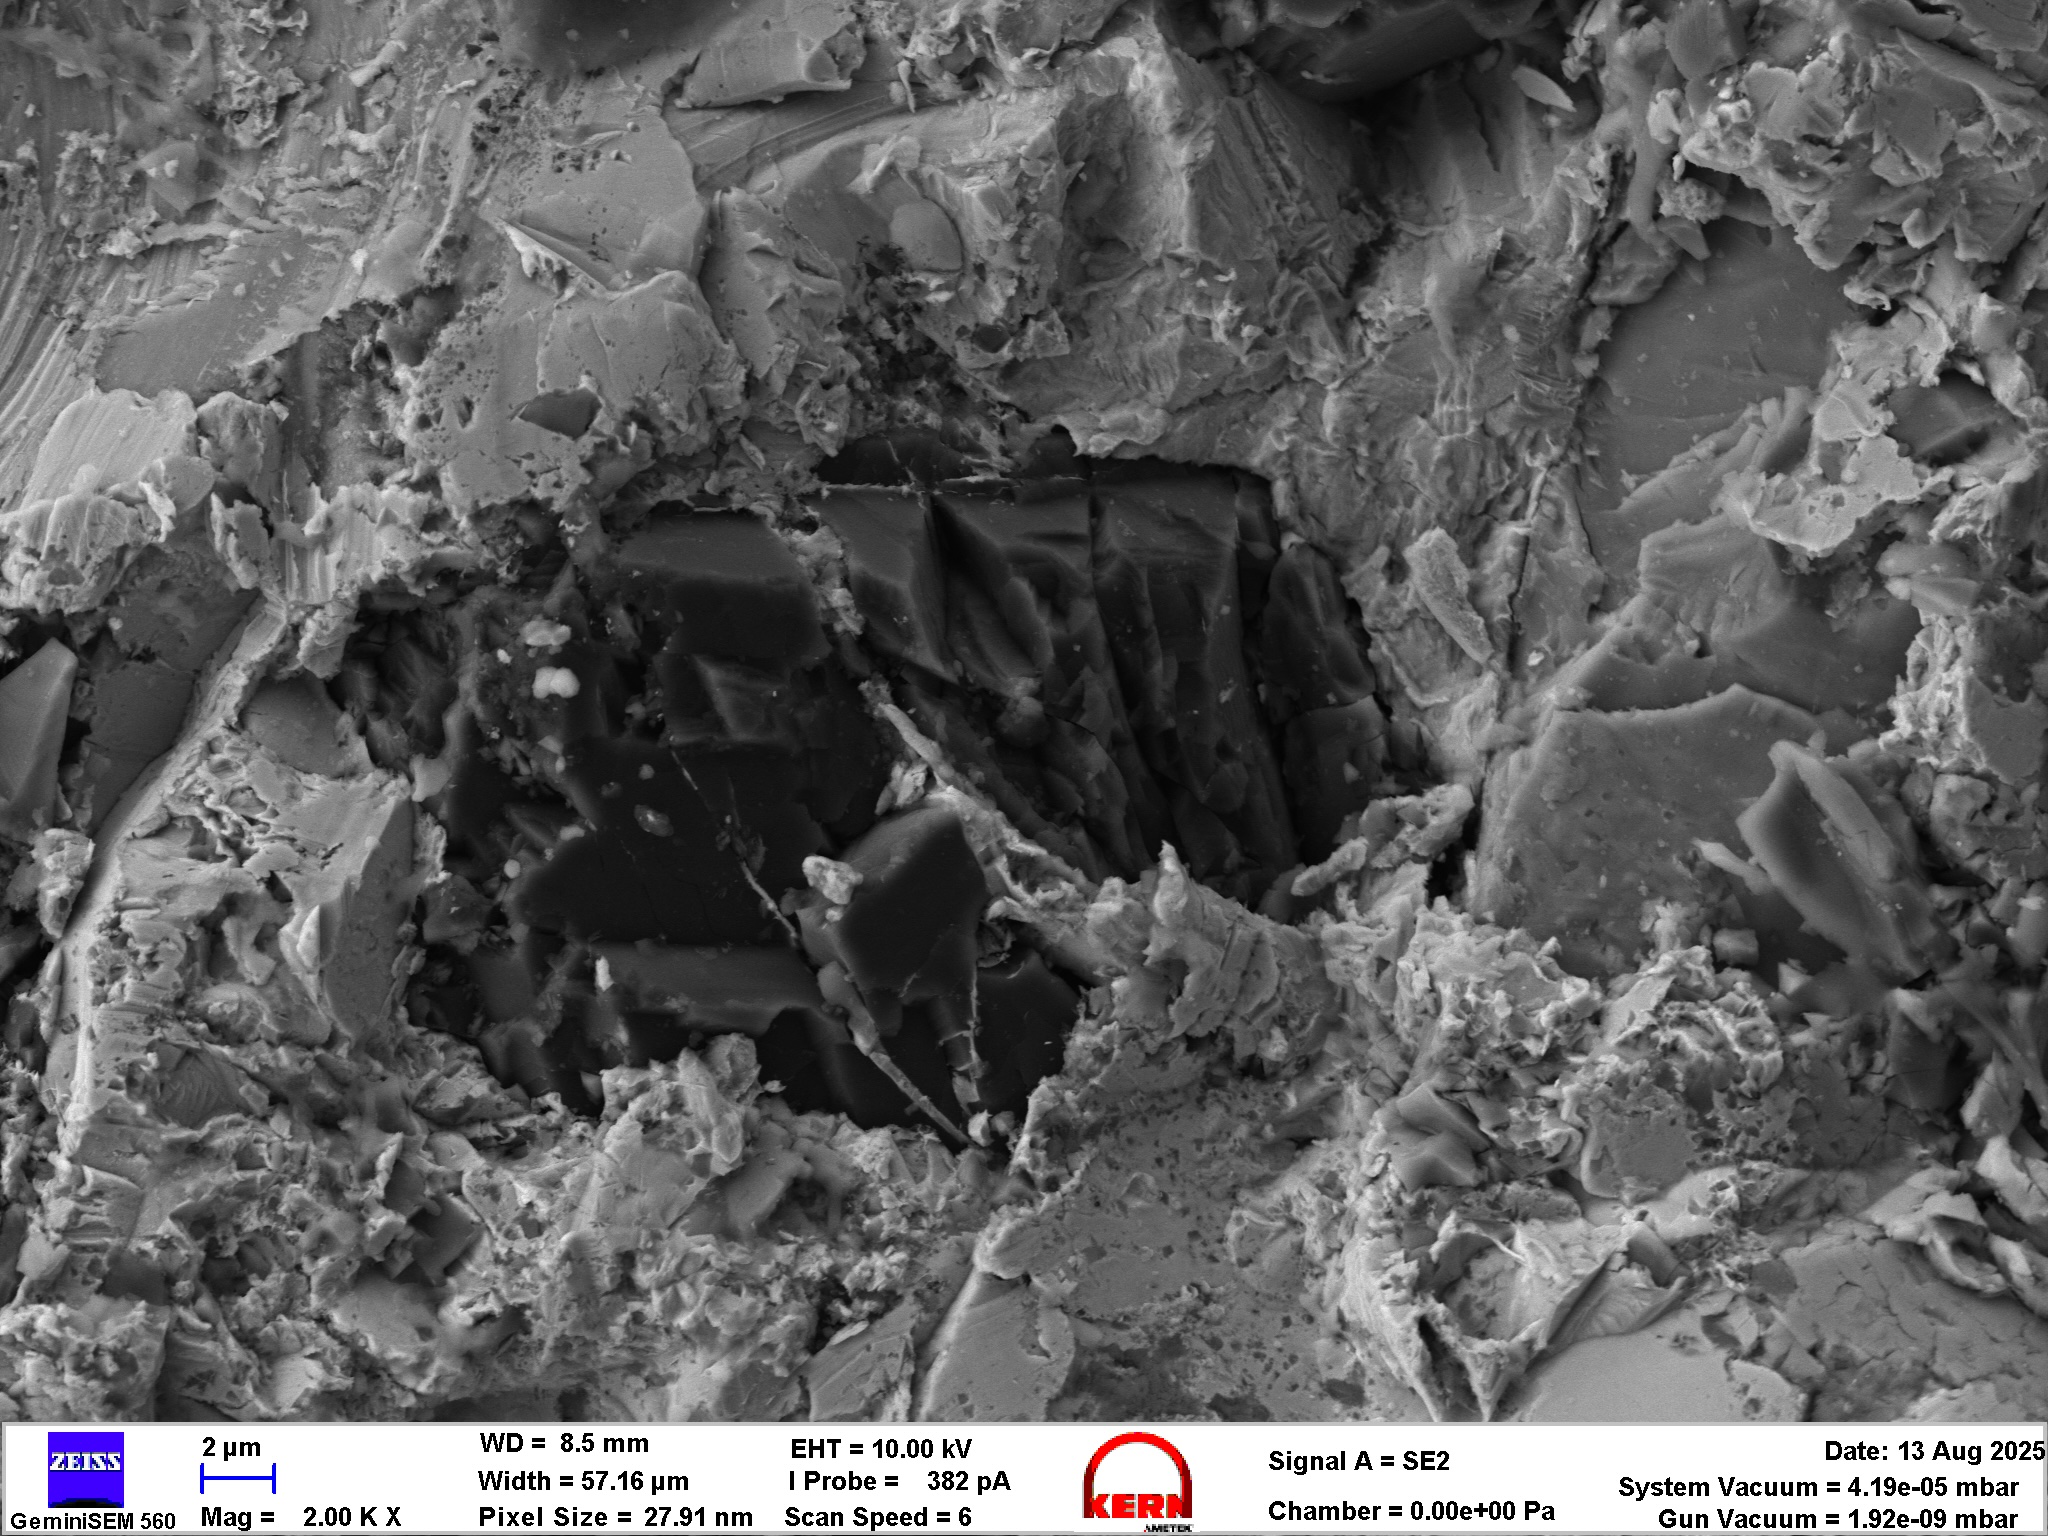
SEM micrographs of the edge finished with the Atoma F140 stone. Instrument: Thermo Fischer PhenomXL SEM.
The SEM picures show a fuzzy looking edge. Very fine serrations are visible, with a formed apex. The overall surface finish looks very scratched – besides the longer scratches that come from the sharpening action, a large amount of fine micro scratches and prow formation (like a miniature burr on a flat face!) is visible. This typically happens when instead of an abrasive, the workpiece material is smeared around.
This fits together very much with how the stone felt – it loaded up very quickly, with both oil or soapy water. The optical micrographs also show this matte, marred surface:


Optical micrographs of the edge finished with the Atoma F140 stone.
Overall, I think this is one of the better “fine” EP stones. But at this size, there’s much better resin stones on the market. Unlike the F140 and the F400 stone, this isn’t my favourite stone and won’t go into the “use on every blade” case.
Sharpening disclaimer: I use a standardised approach to sharpening, which basically follows how most manufacturer of guided systems tell you to use this system. I am very aware, that every stone could perform much better than this, in terms of sharpness, but I want a comparable approach. The sharpening segment mostly shows the material removal mechanism – is it burnishing? is it cutting? is the cutting pressure too high so that carbides crack? Is there massive burr or prow formation? The BESS value definitely doesn’t highlight the ultimate sharpening performance of the stone, but was an often requested information. Over time, this blog will show BESS values for different edge morphologies, but by the holy endmill – don’t read it as a „this is the max value this stone can achieve“. I would also suggest to familiarise yourself with the works of Immanuel Kant, it’s absurd I need to write such a disclaimer here.